I decided to print myself a unique Halloween costume this year after being inspired by pictures of deep sea angler fish. I wanted to make something quirky yet still a little bit terrifying in a good way.
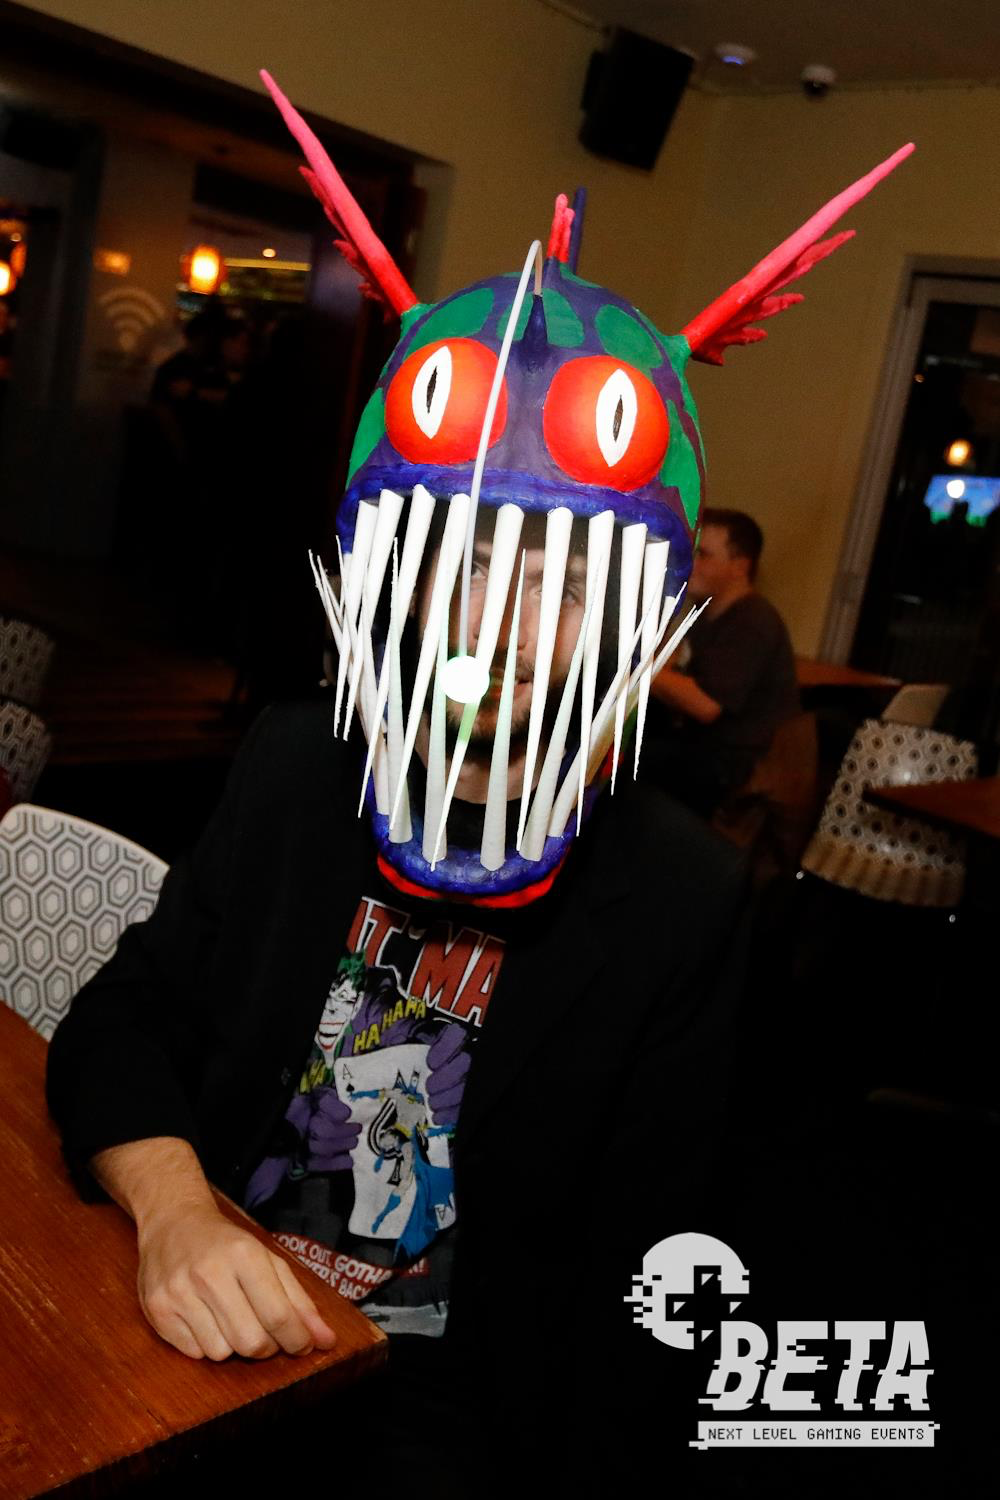
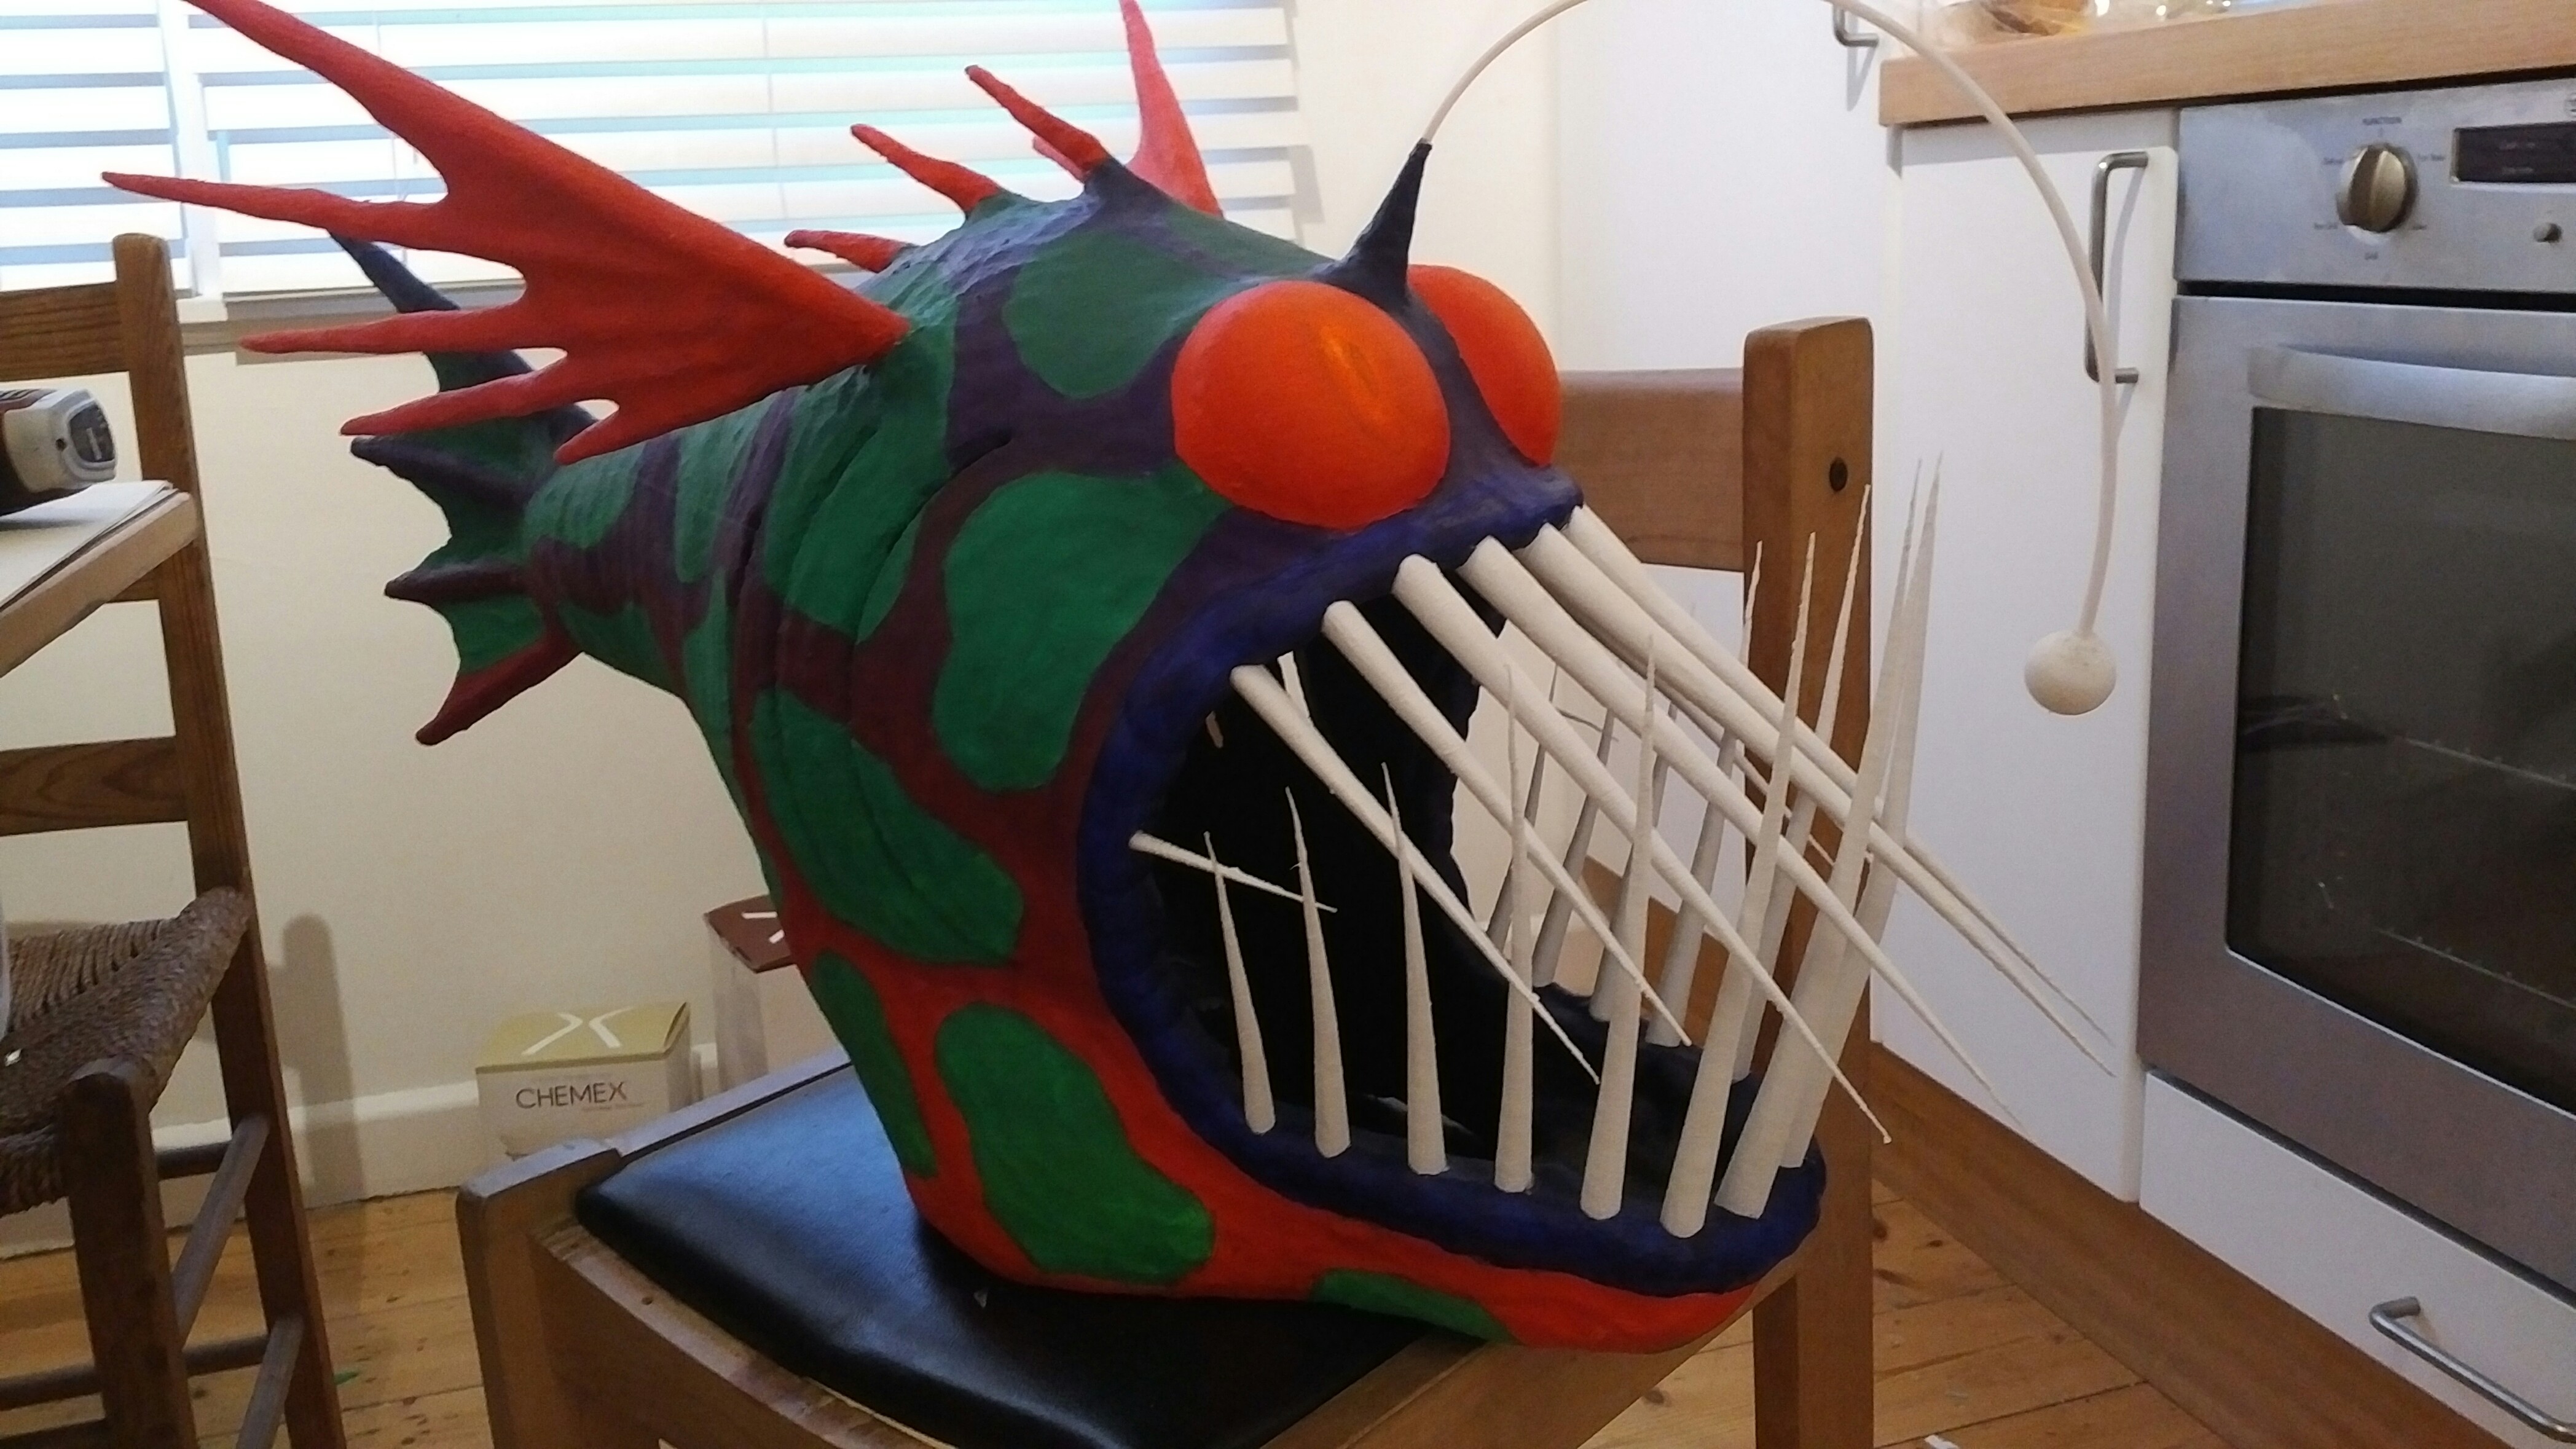
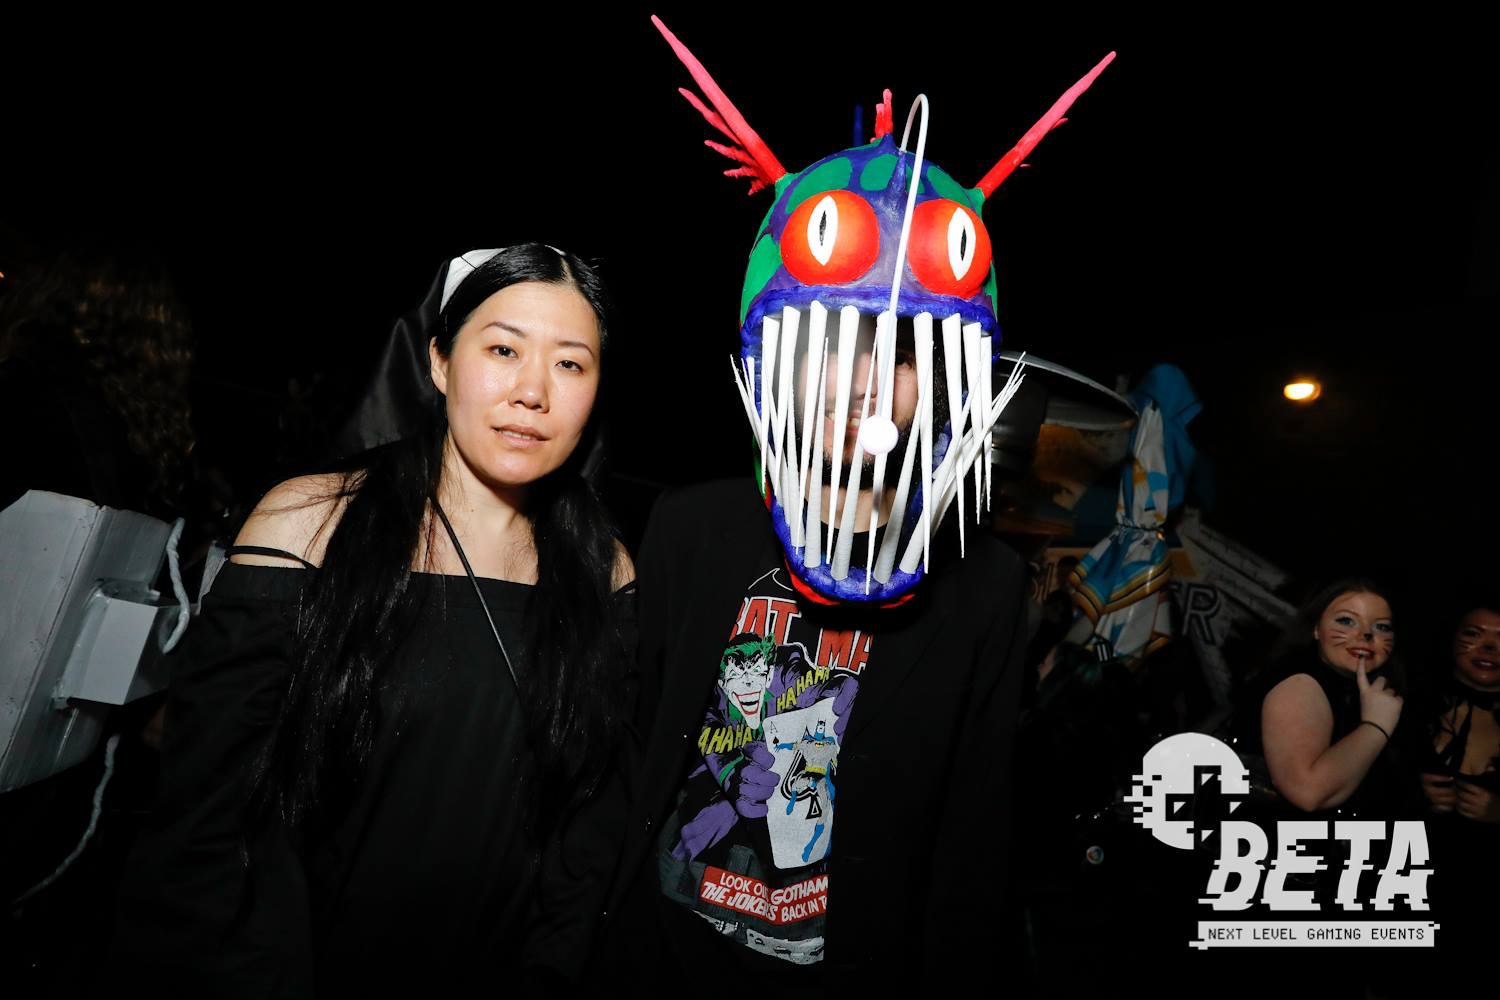
What I ended up with was an angler fish helmet painted in fluro UV paints with very scary teeth.
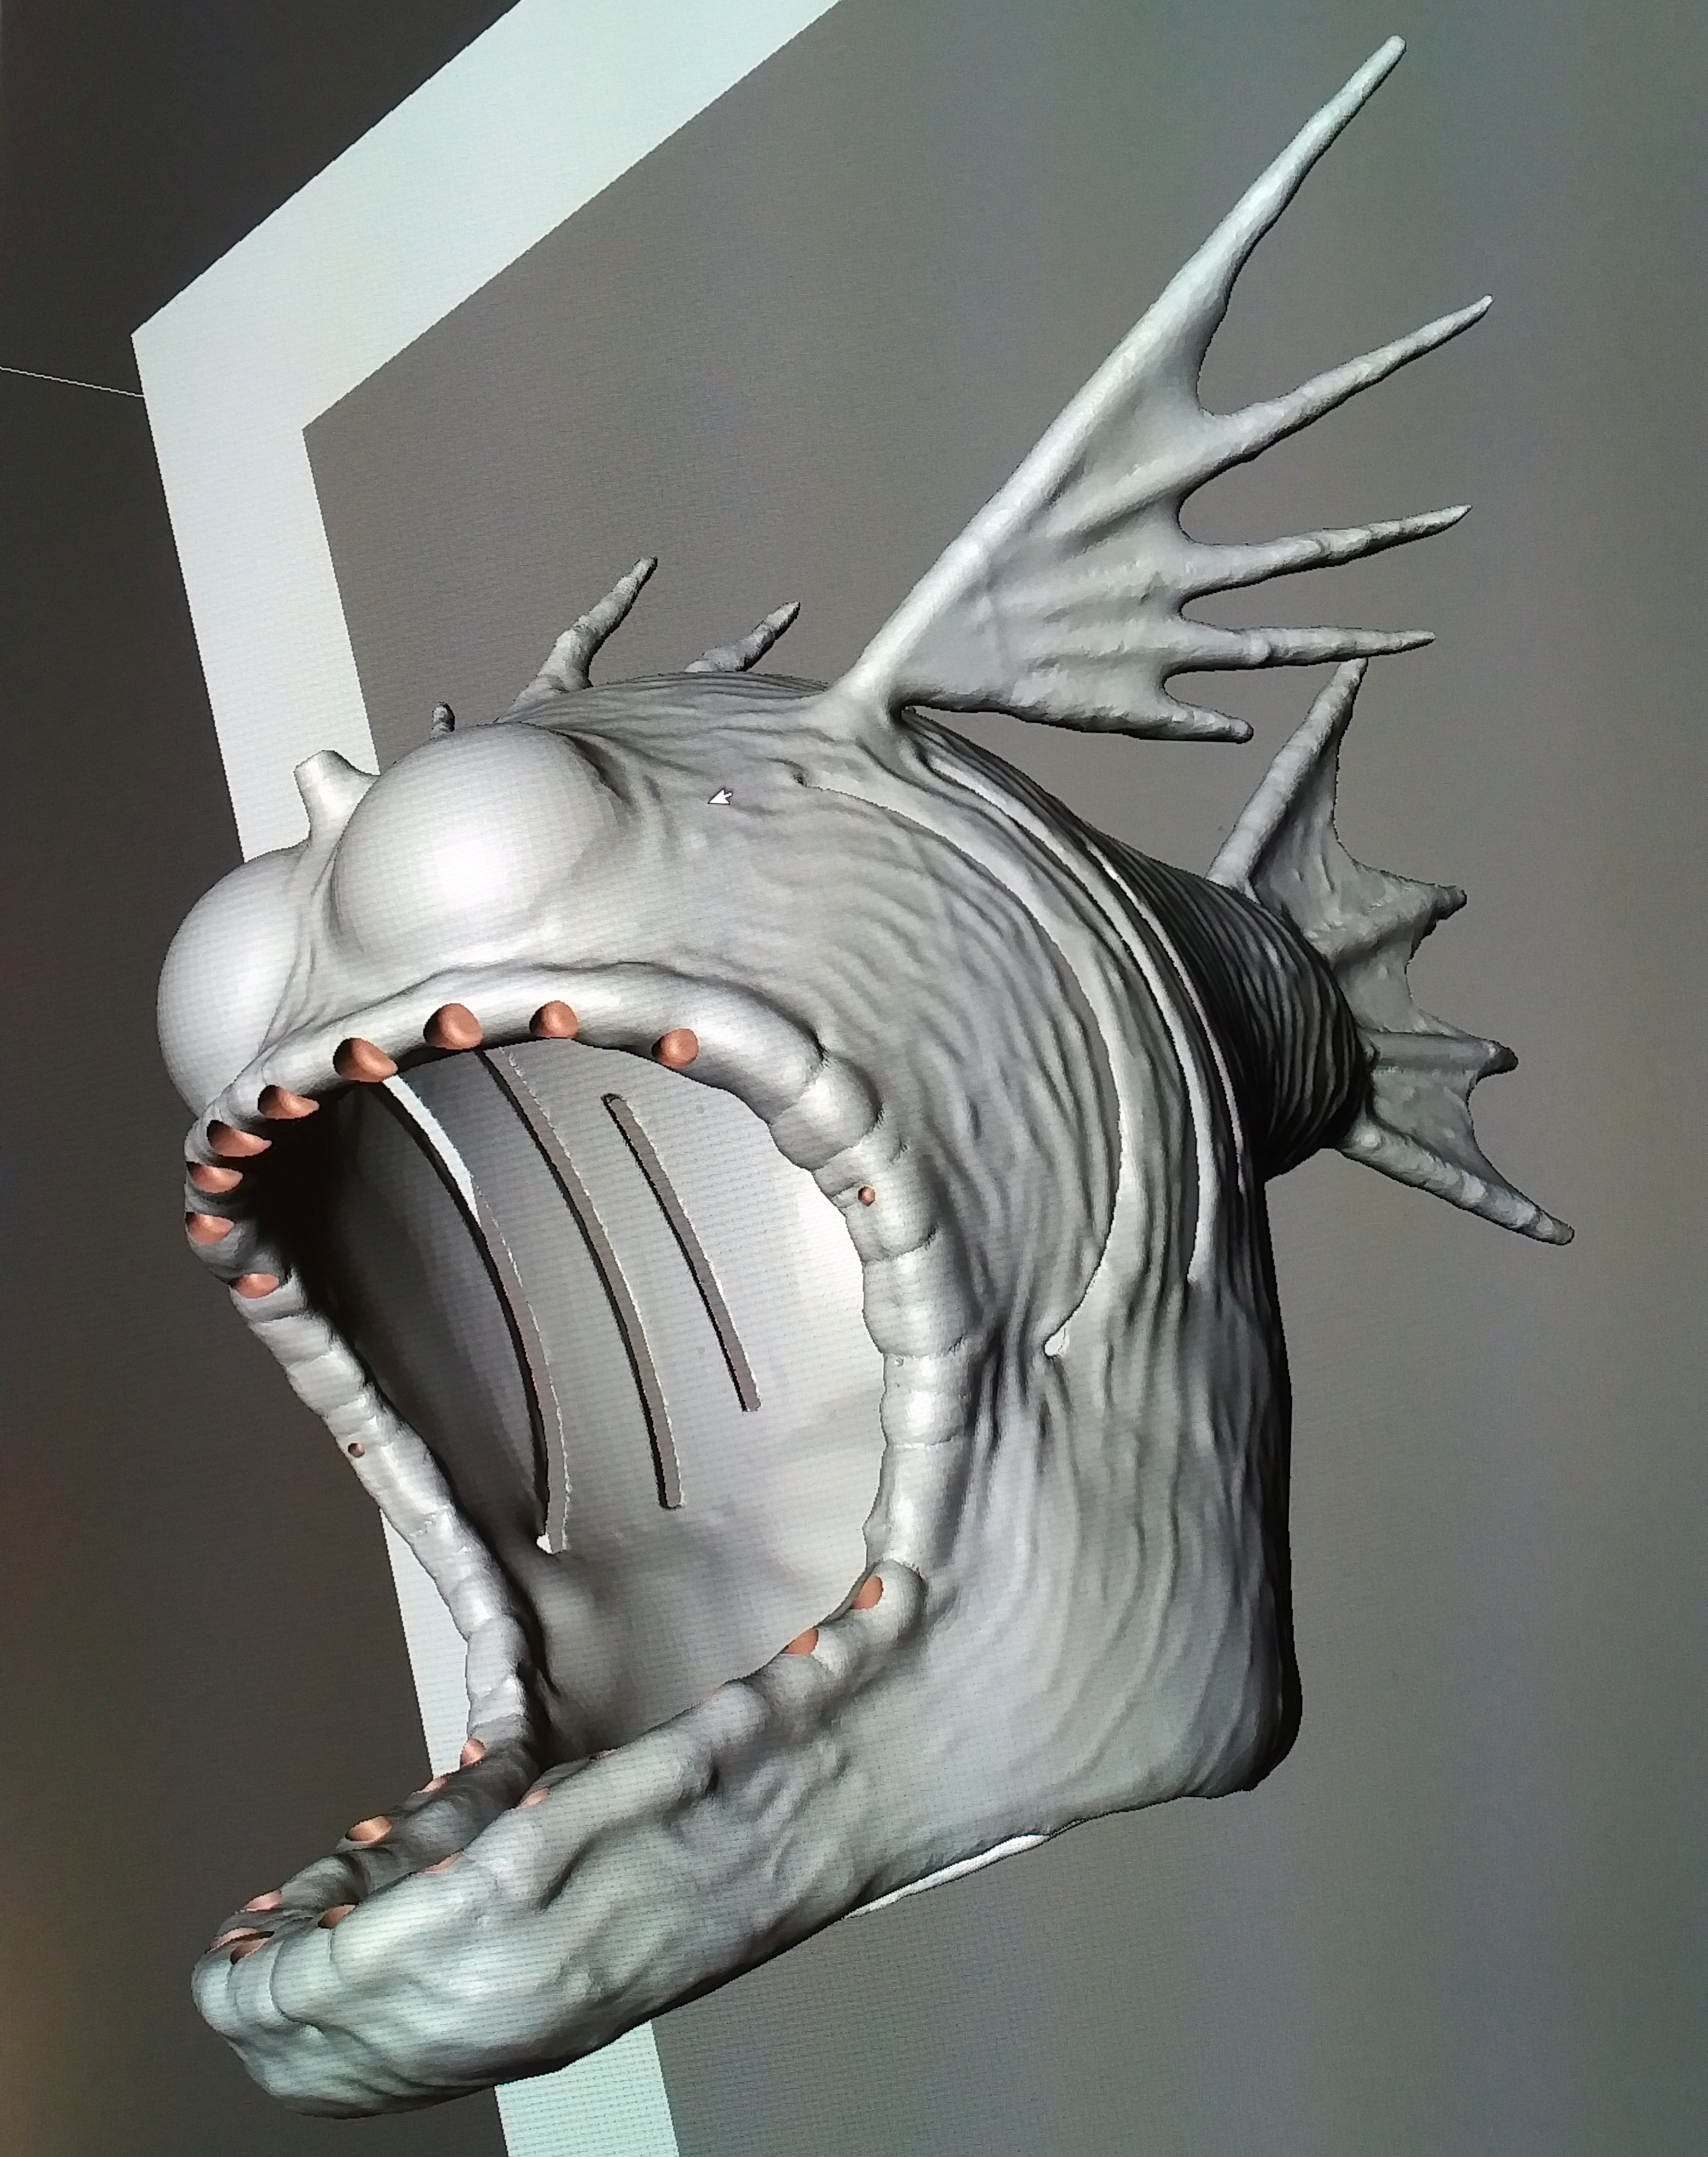
 The design was roughed up out of primitives in 123D design, then shaped and refined in meshmixer.
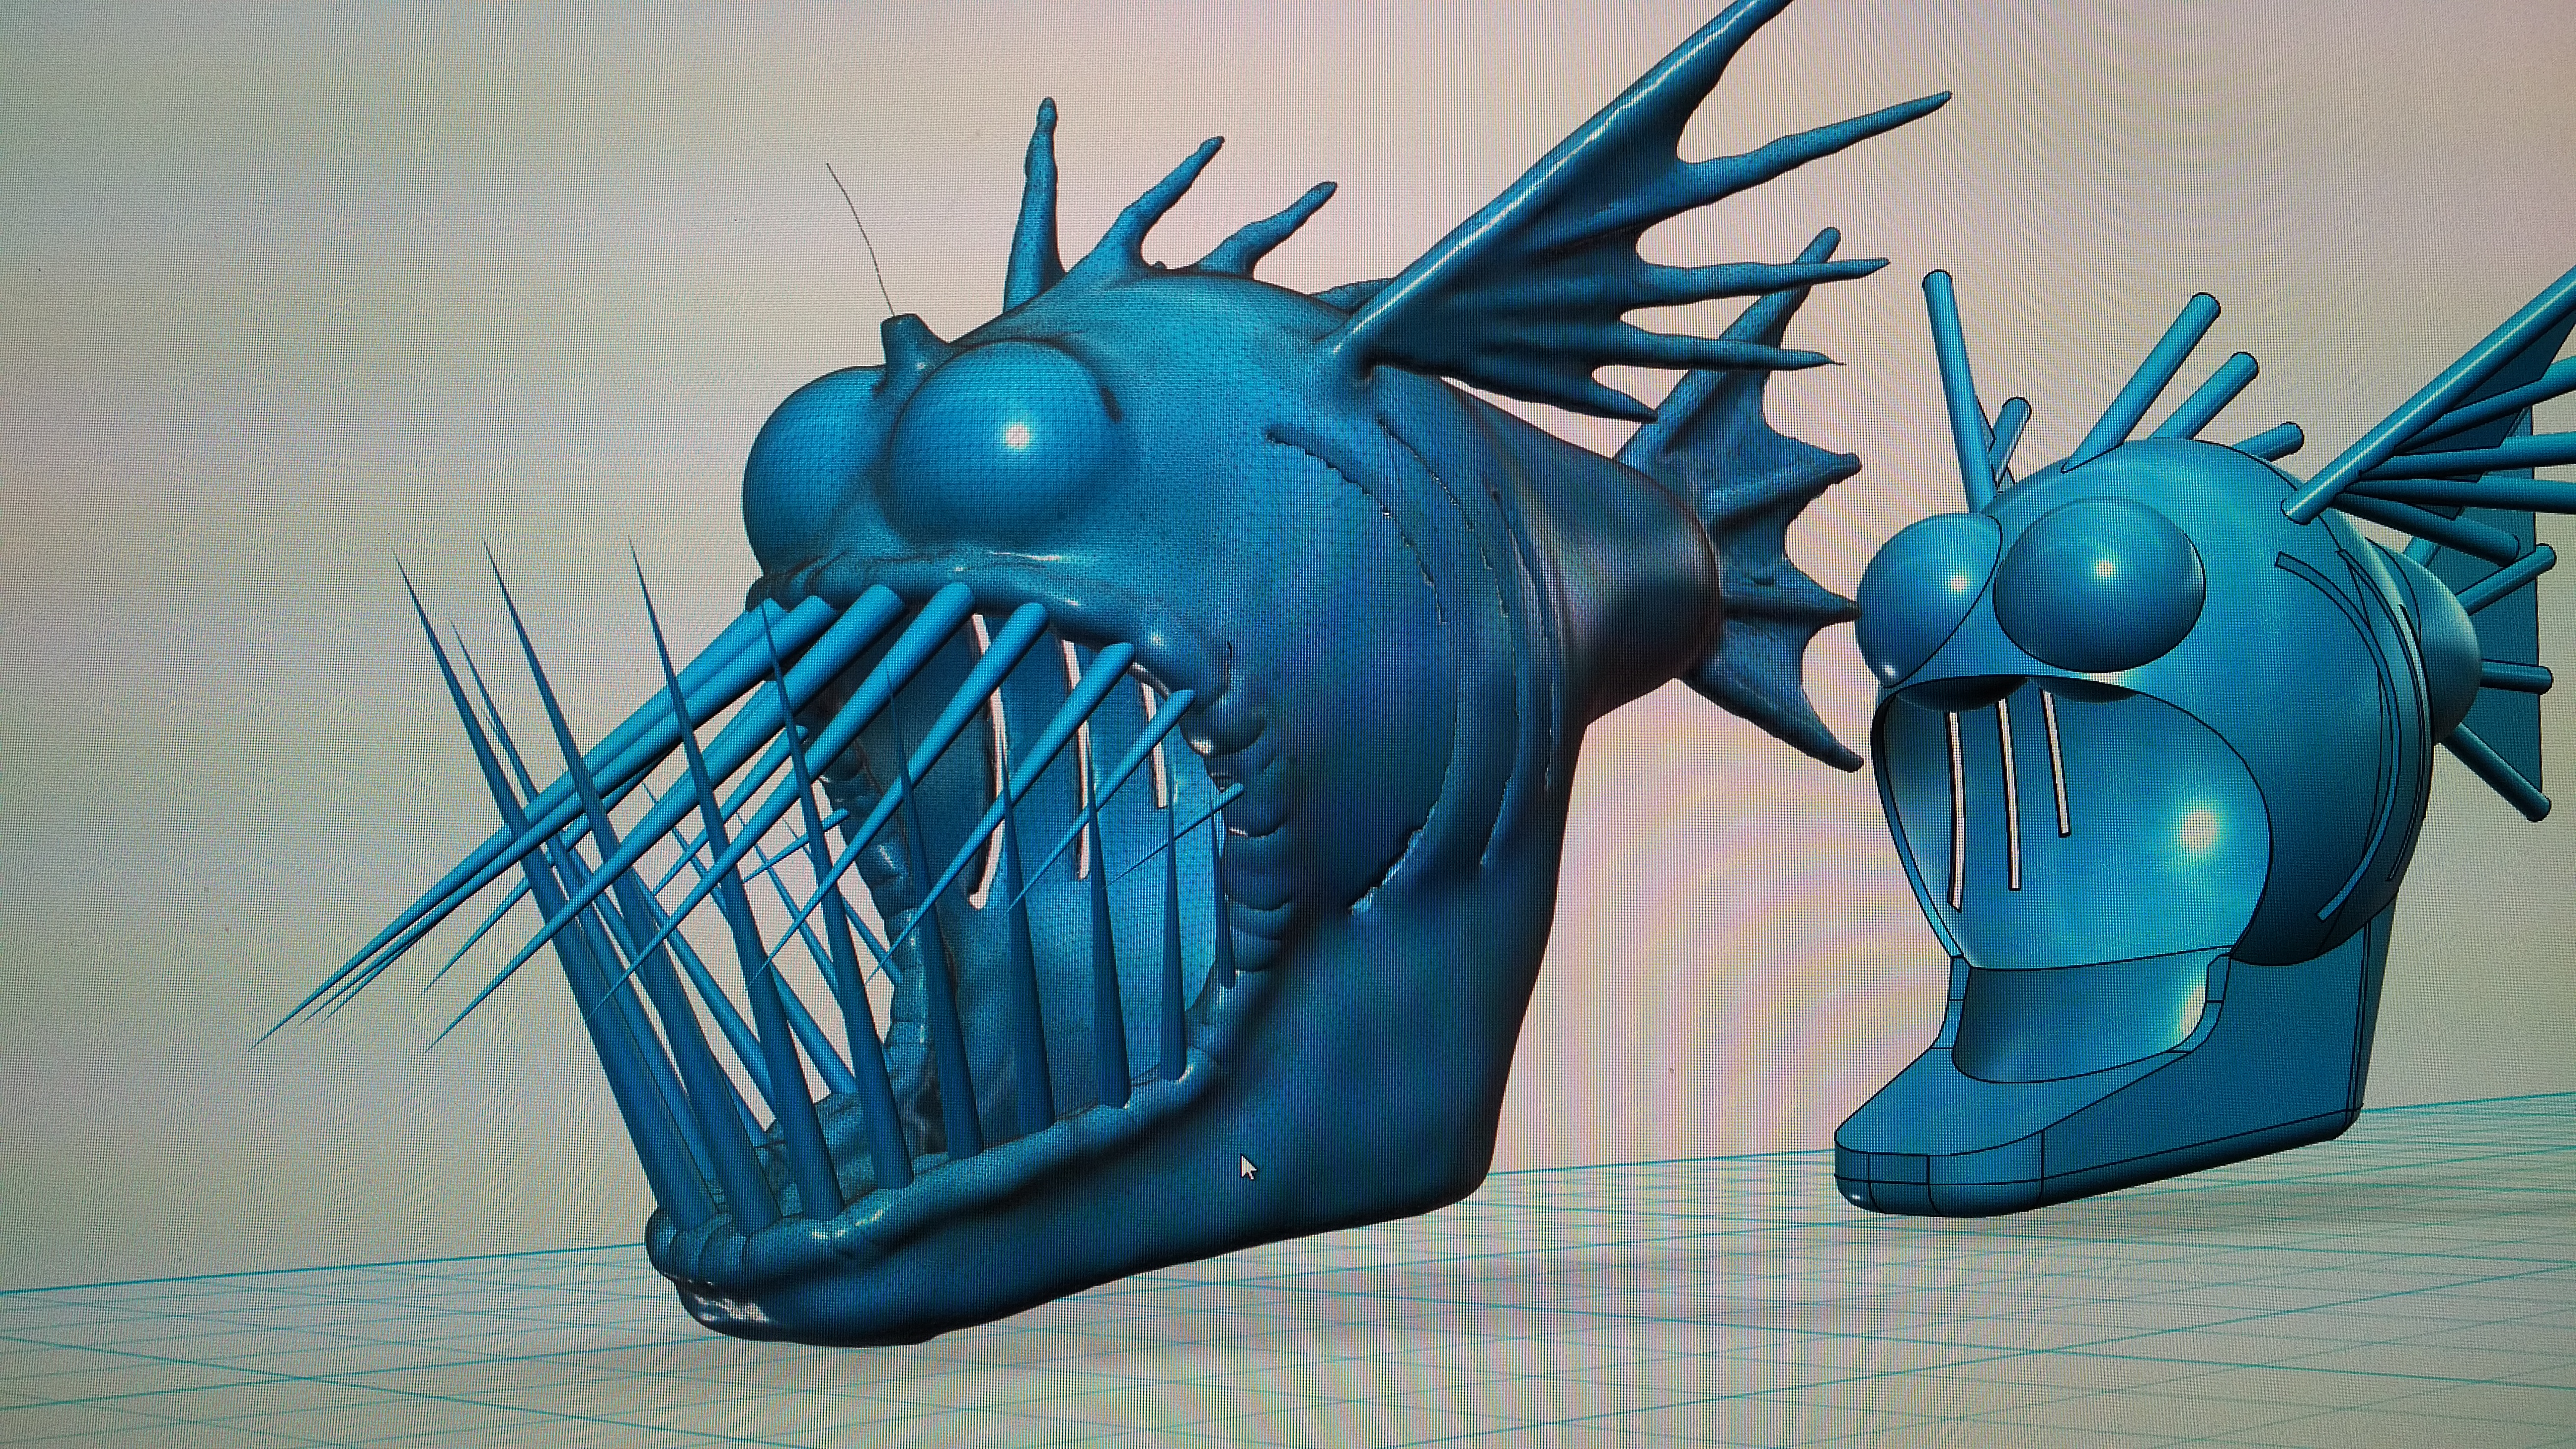
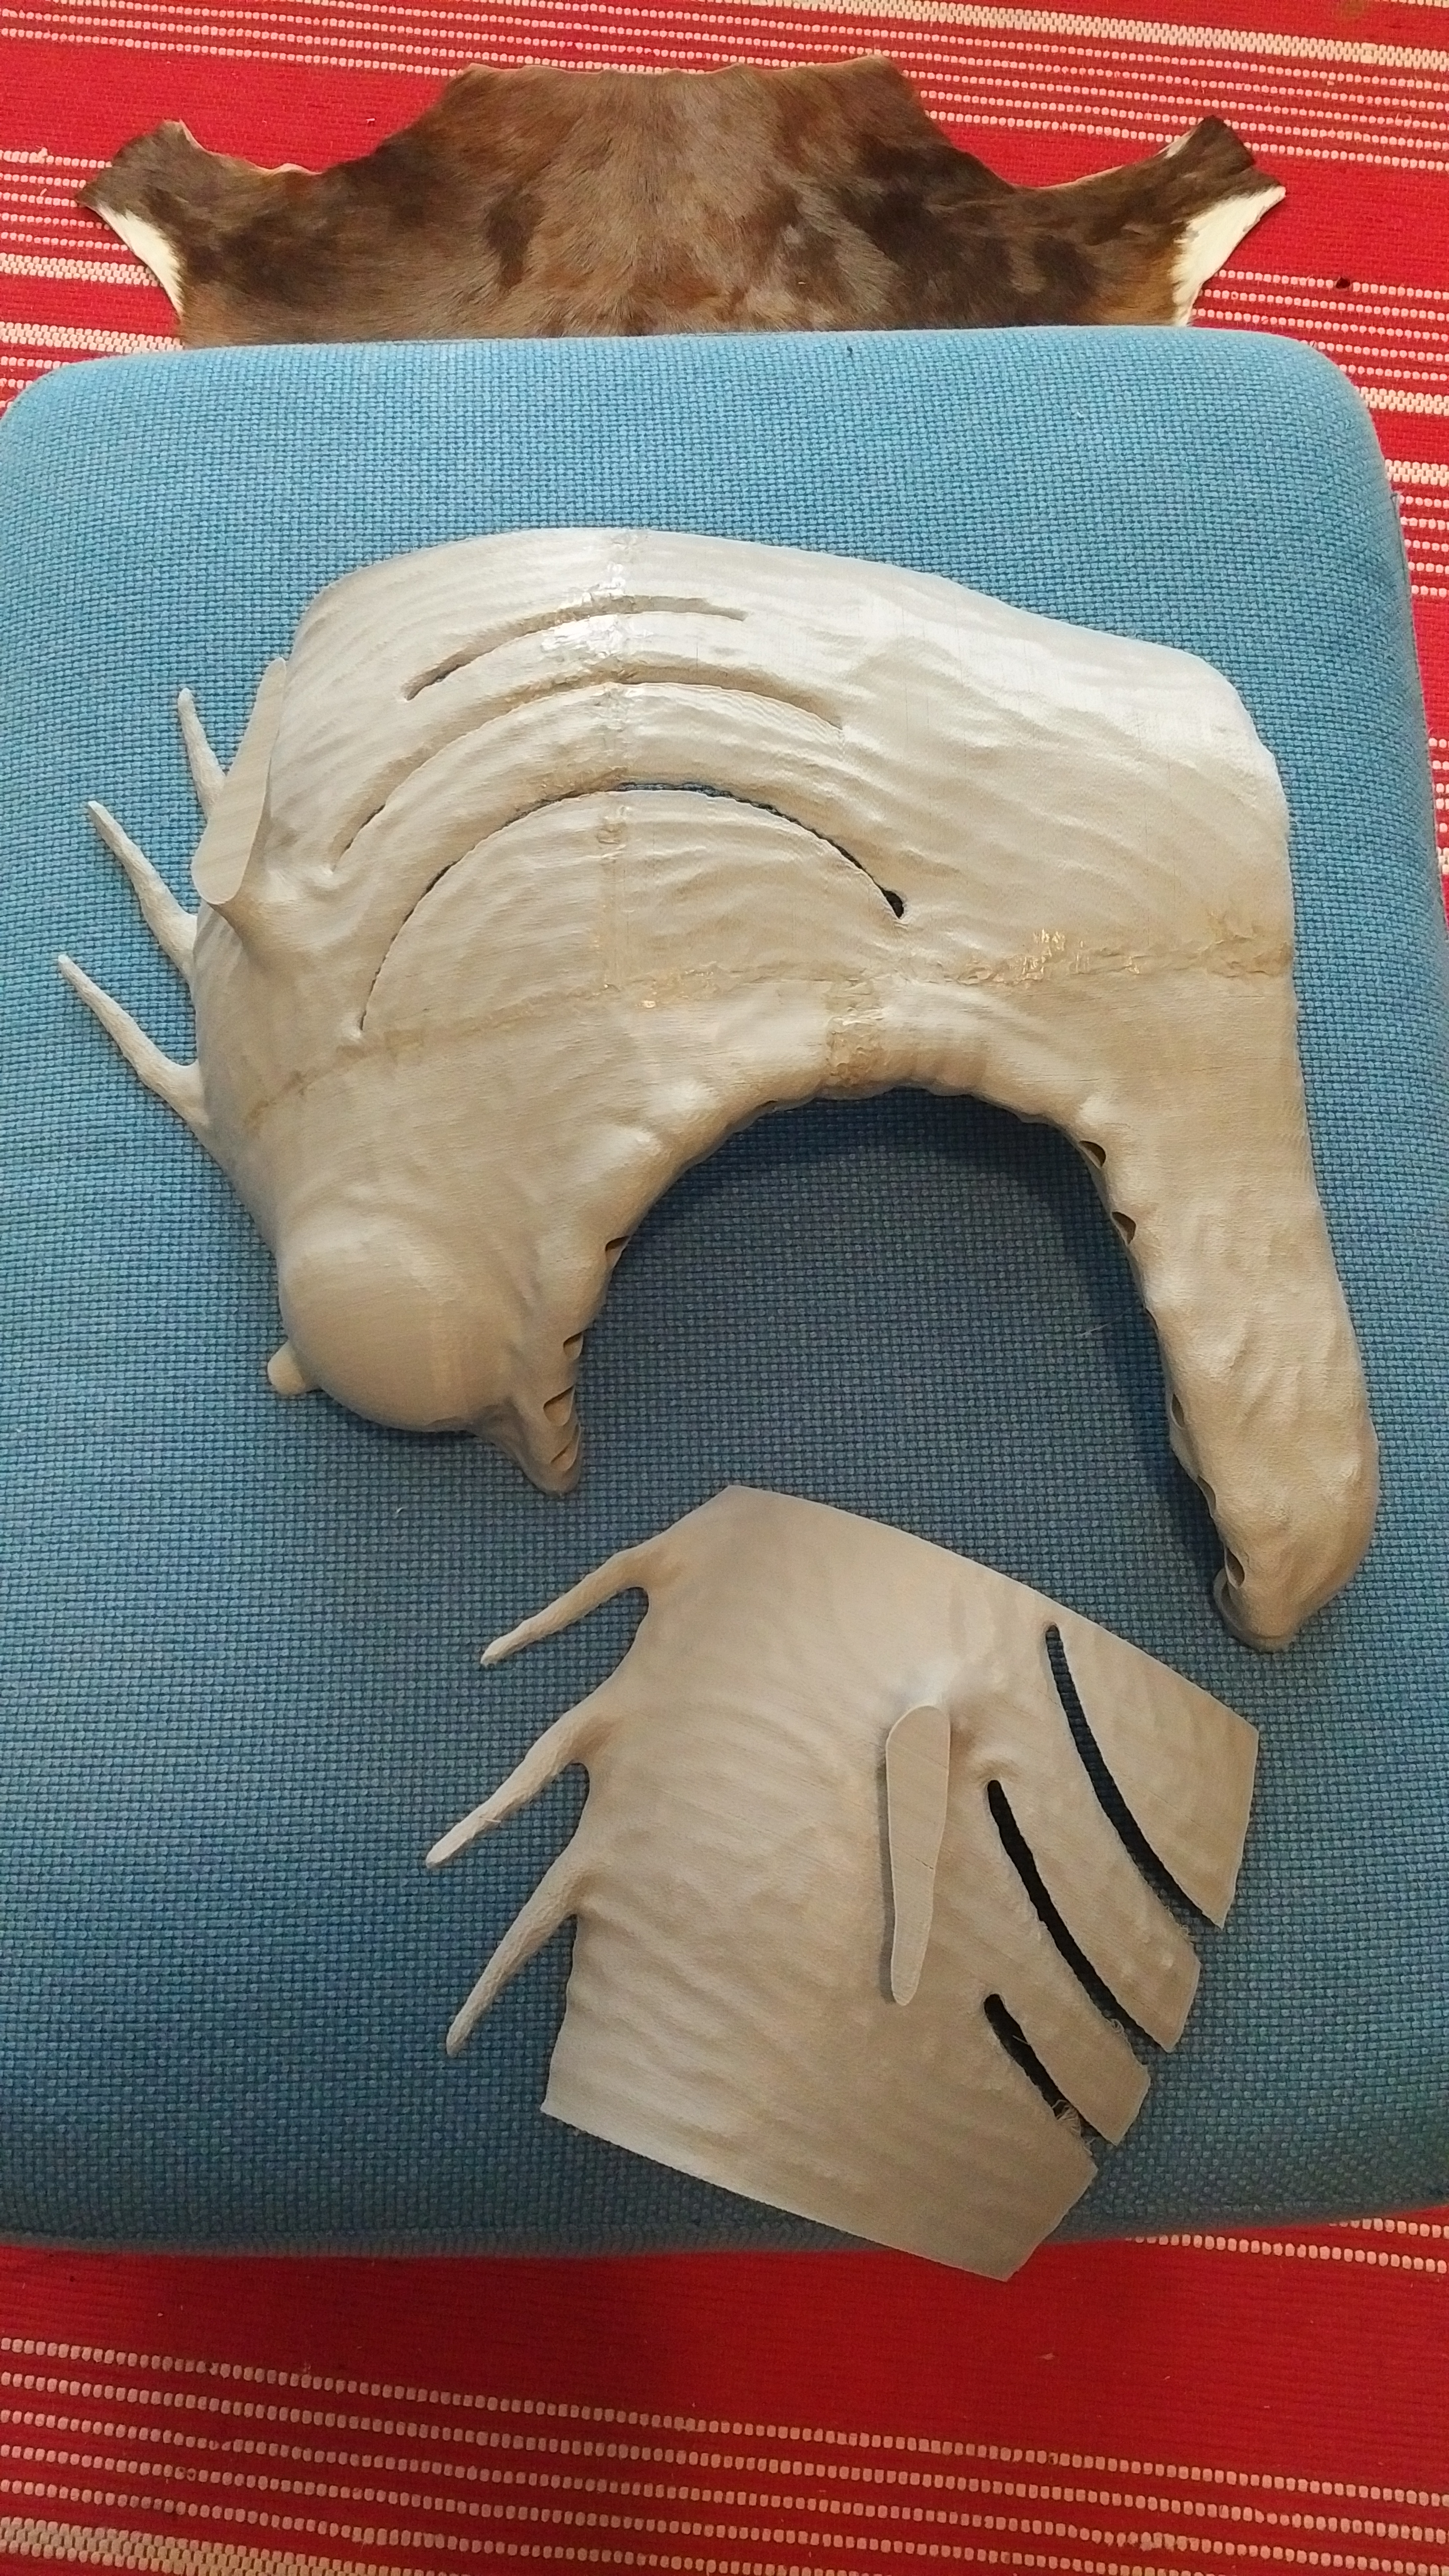
The body of the fish was printed out in multiple sections, so depending on the size of your print bed you will need to slice the model up into sections. I found that the simplest way was to slice it vertically down the center line, then carve it up into manageable pieces from there. Splitting it down the center line simply means that you can mirror your STL files when making the second half.
You will want to measure your head, then choose the appropriate scale for you, I have a rather large head so ended up printing it at x17 scale. An easy way to test the fit is to slice the fish cross-ways at the widest part and print a small cross-section to see how it fits.
You will want to scale the teeth by this same factor, however I would suggest making them a fraction smaller to make it more easy to fit them into their sockets.
The cone for holding the angler light rod and the ball for the light are at a x17 scale, so this will have to be adjusted if you change your scale, but this can easily be done in your slicer.
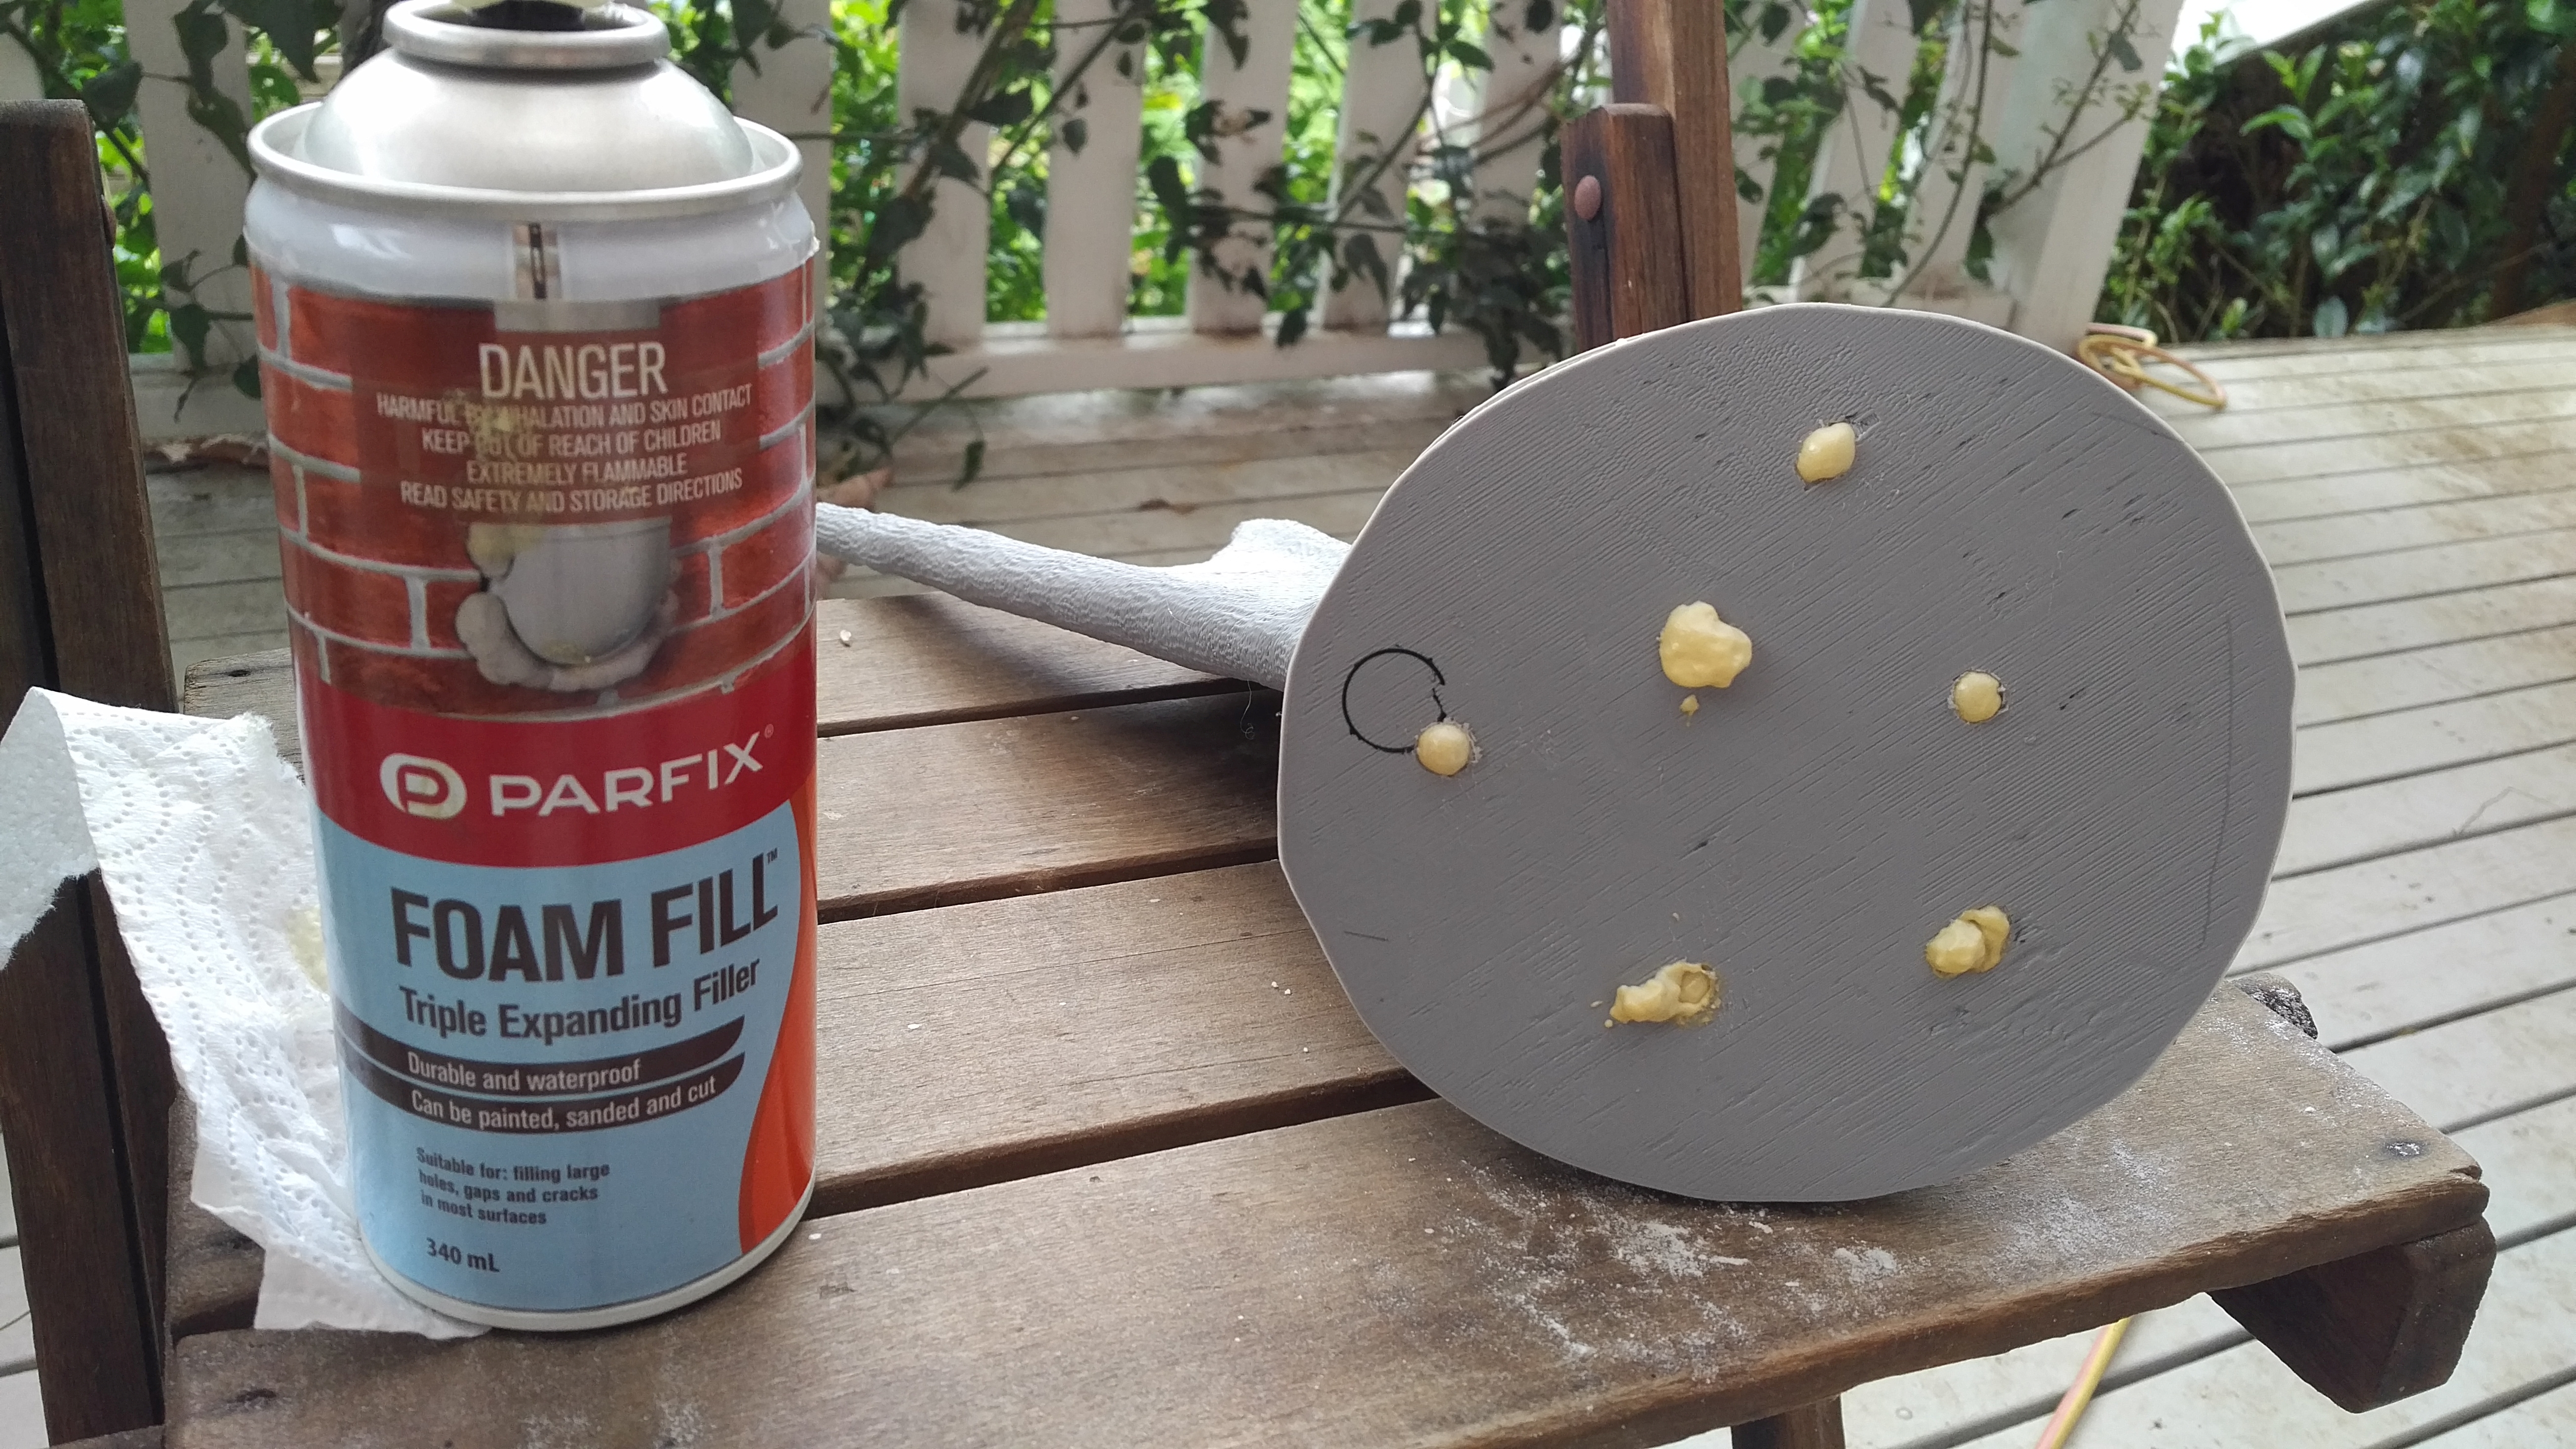
The shell was printed with a wall and top/bottom layer thickness of 0.8mm and a 0% fill density. I wanted the parts to be hollow so as to accommodate the rapid expanding foam that I later injected into the hollow shell.
Supports were used whenever there was a large overhang, but if you are creative when you are sectioning up the model you can greatly reduce the need.
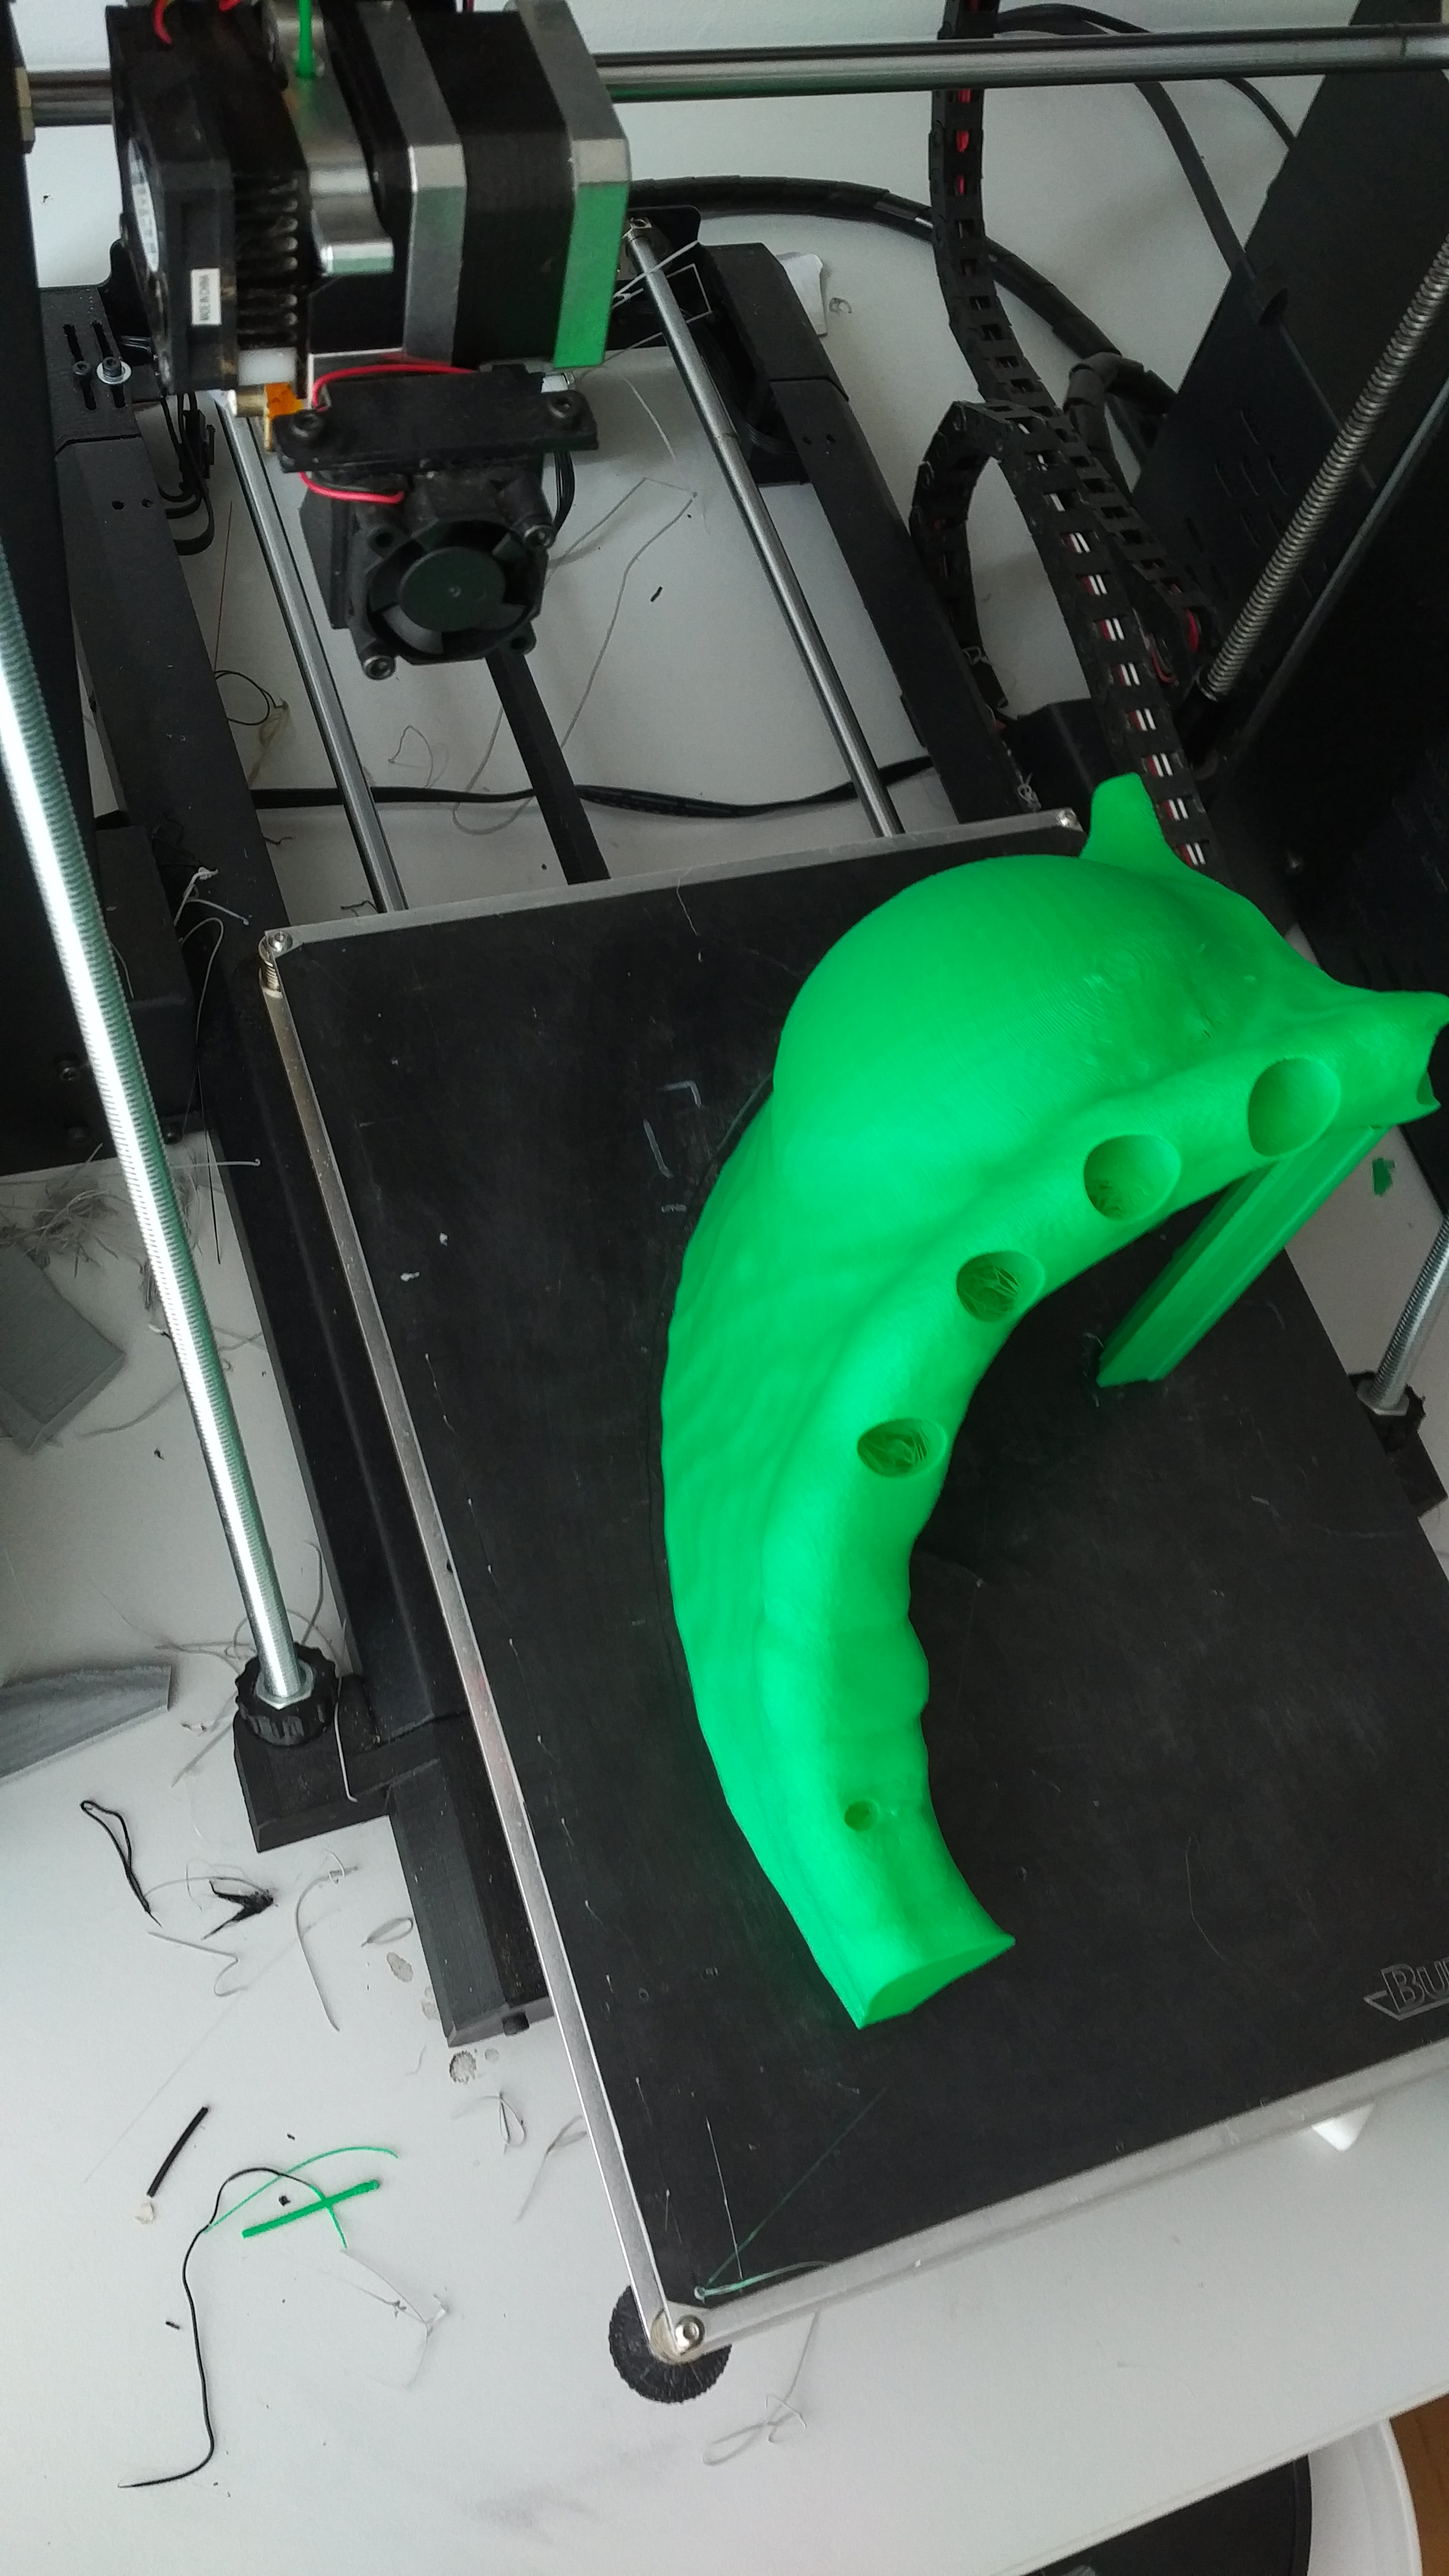
The teeth were printed with a 0.8mm thickness and 15% infill. They were printed vertically with both supports and a raft. I found that printing them one at a time achieved the best results, but they could also be printed in a row, positioned in such a way as to reduce build platform travel. If there is too much build platform movement the quality does suffer.
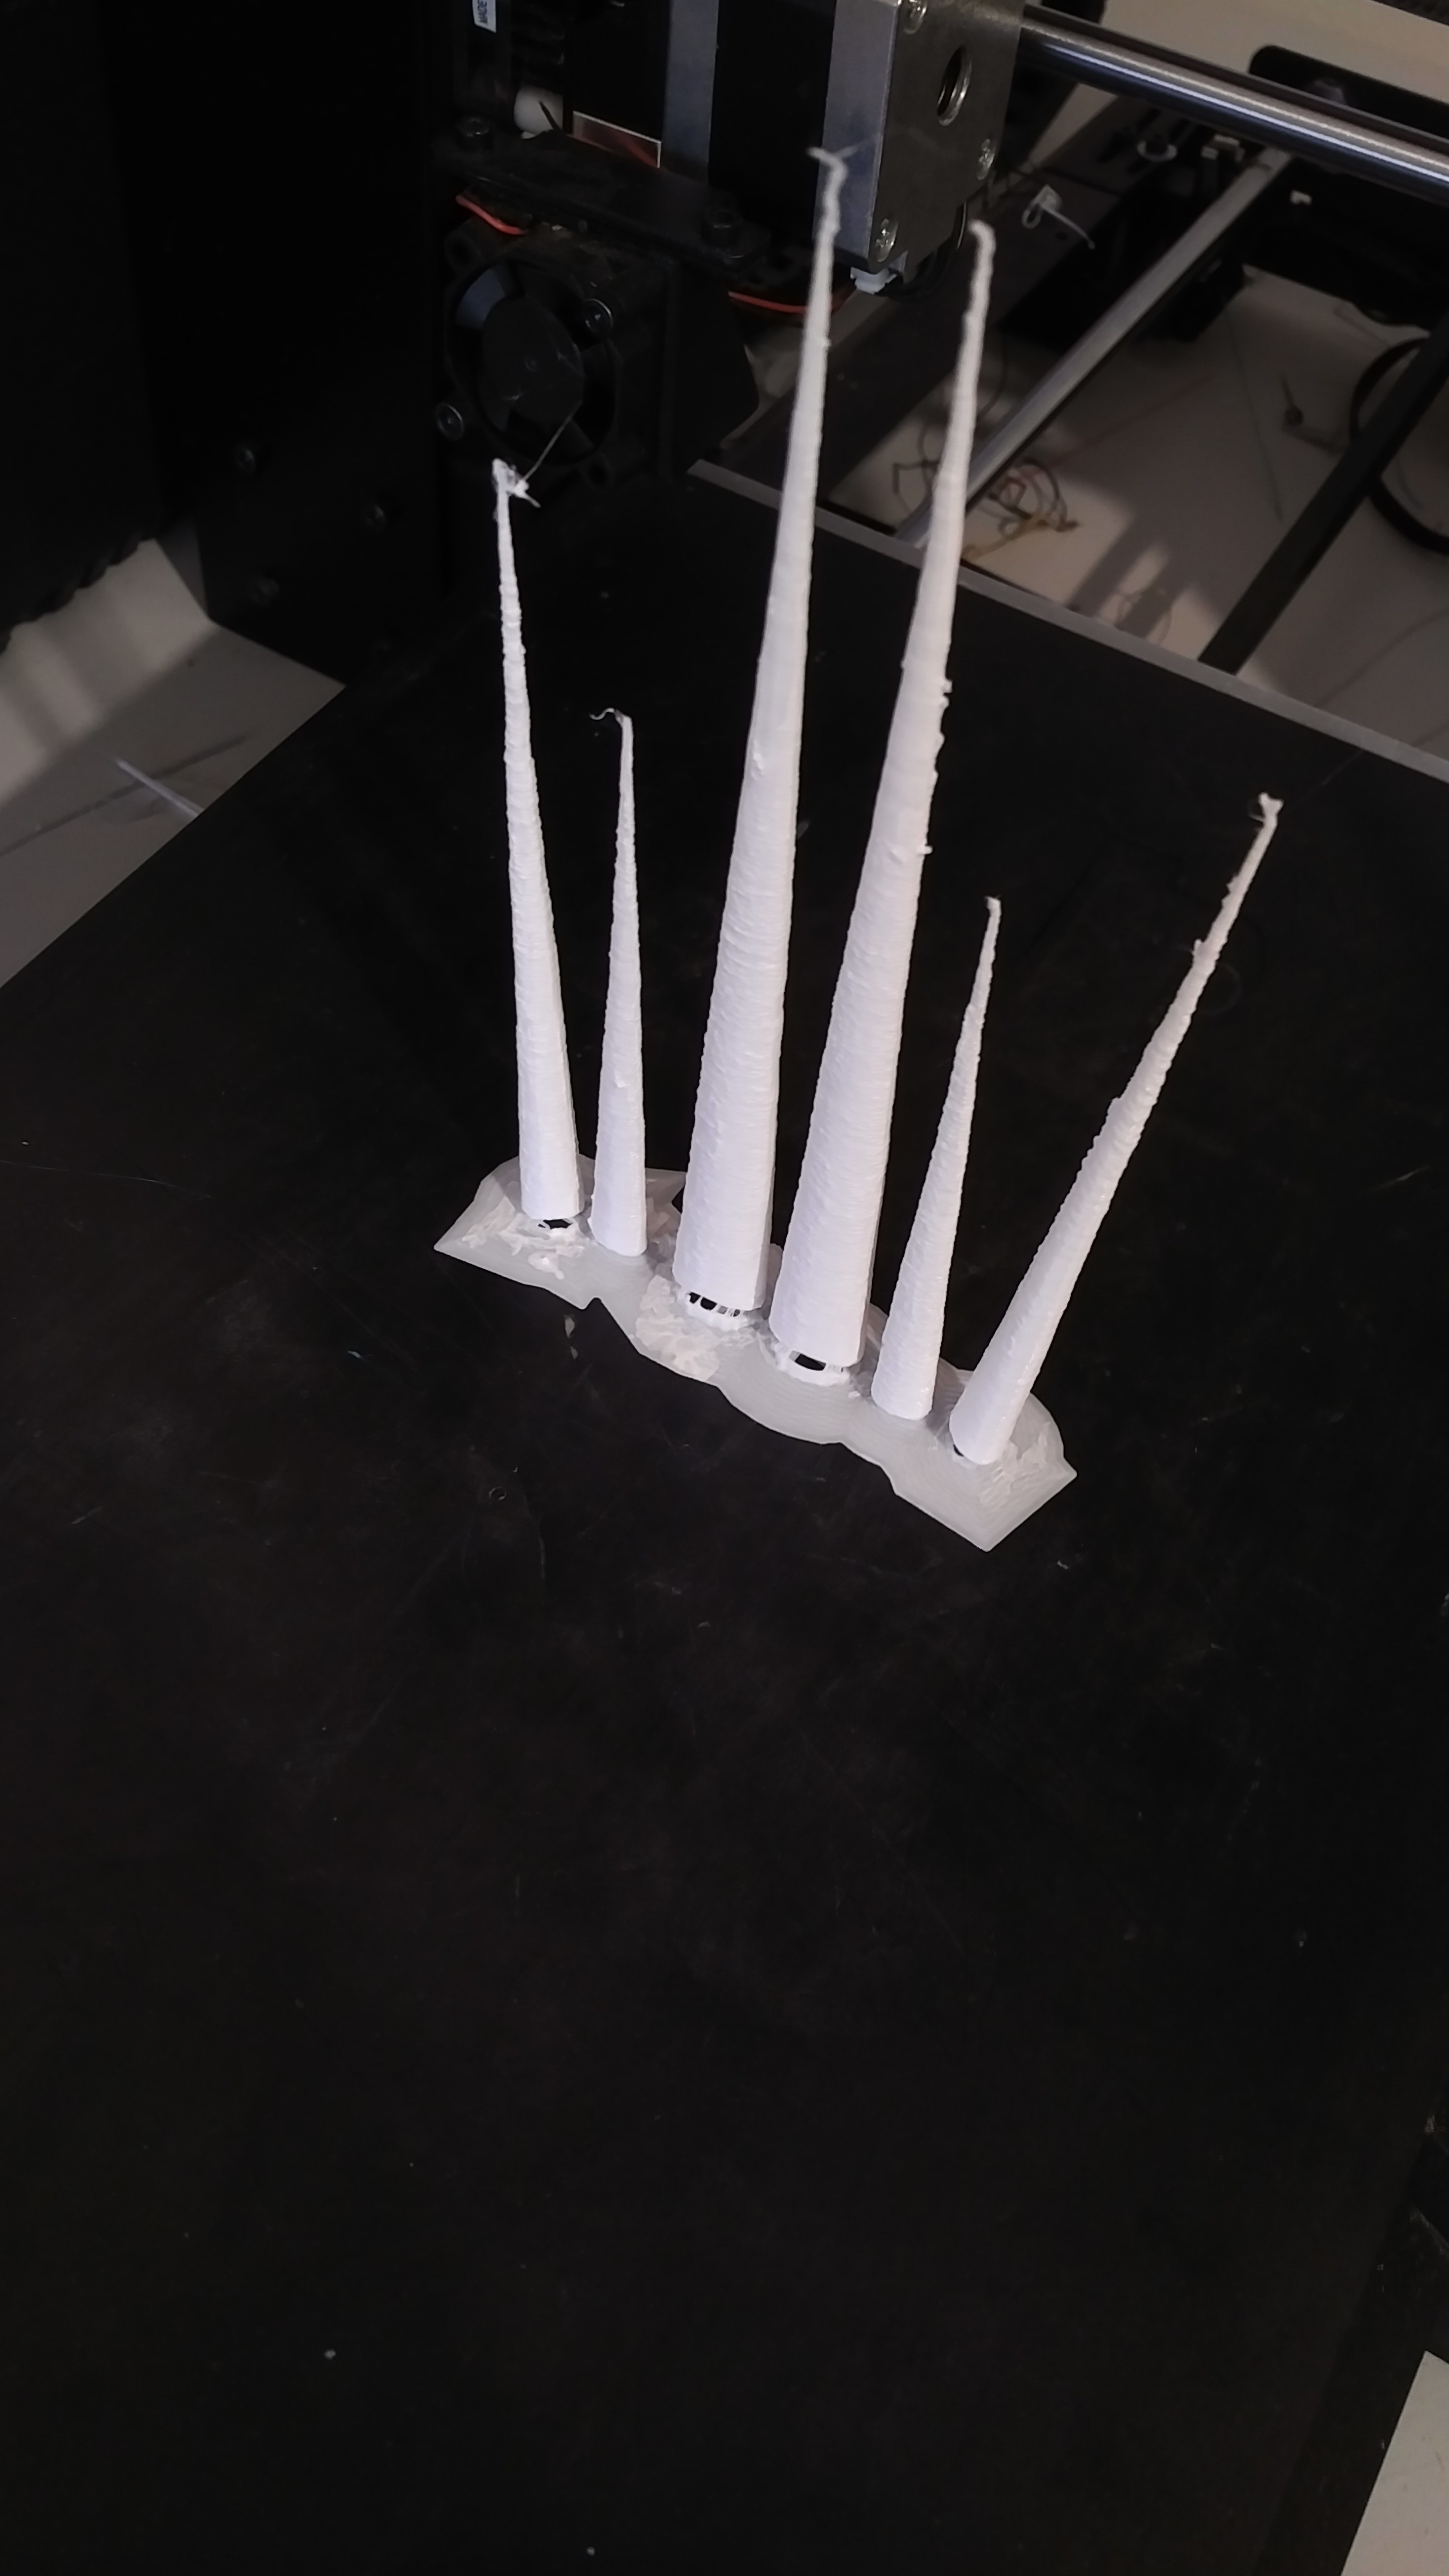
The teeth are also named in order of their position and each file will need to be printed twice except for the top middle tooth.
Assembling the pieces was much more straight forward than anticipated, I simply aligned the pieces, then carefully melted them together using a medium sized soldering iron, when required I’d use excess filament to fill any burn holes or depressions.
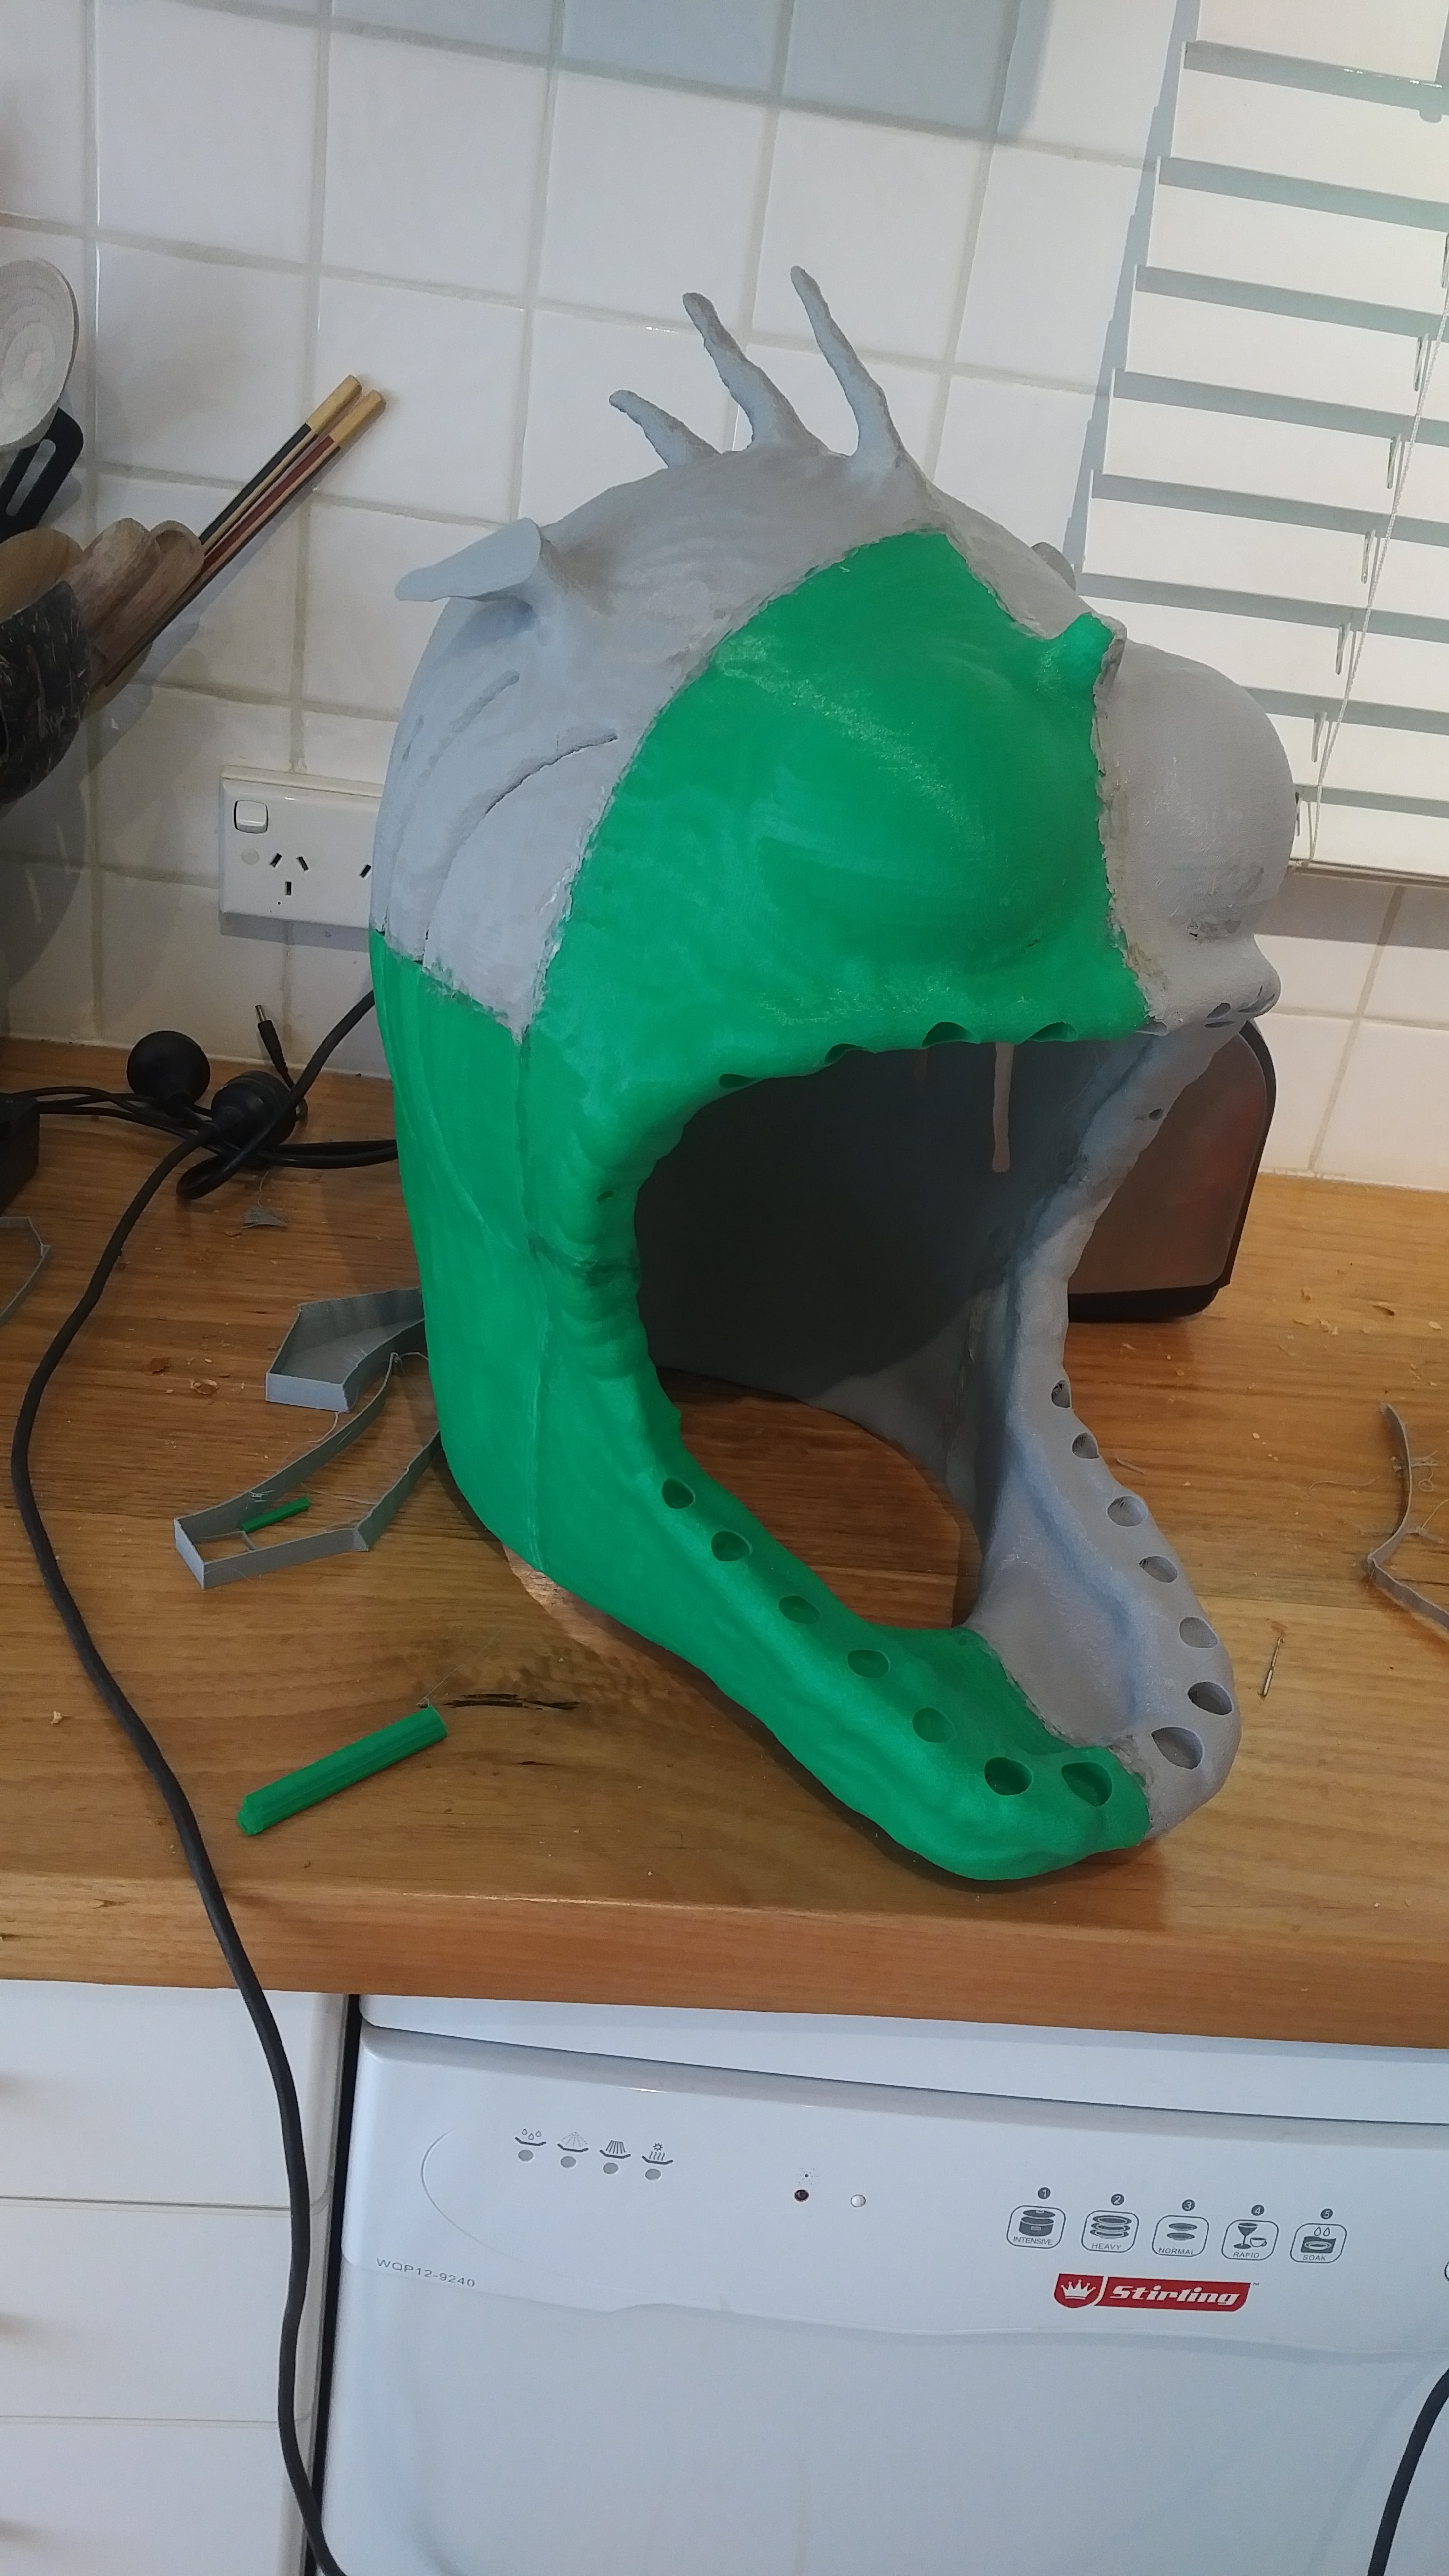
In the few instances where things didn’t quite align correctly I used a hairdryer to gently heat the pieces till i could manipulate them into the correct shape.
Once the helmet was assembled I drilled a series of holes through the inside of the shell, I then carefully injected rapidly expanding foam into the hollow sections of the printed shells, this made the helmet instantly very durable while still remaining super light.
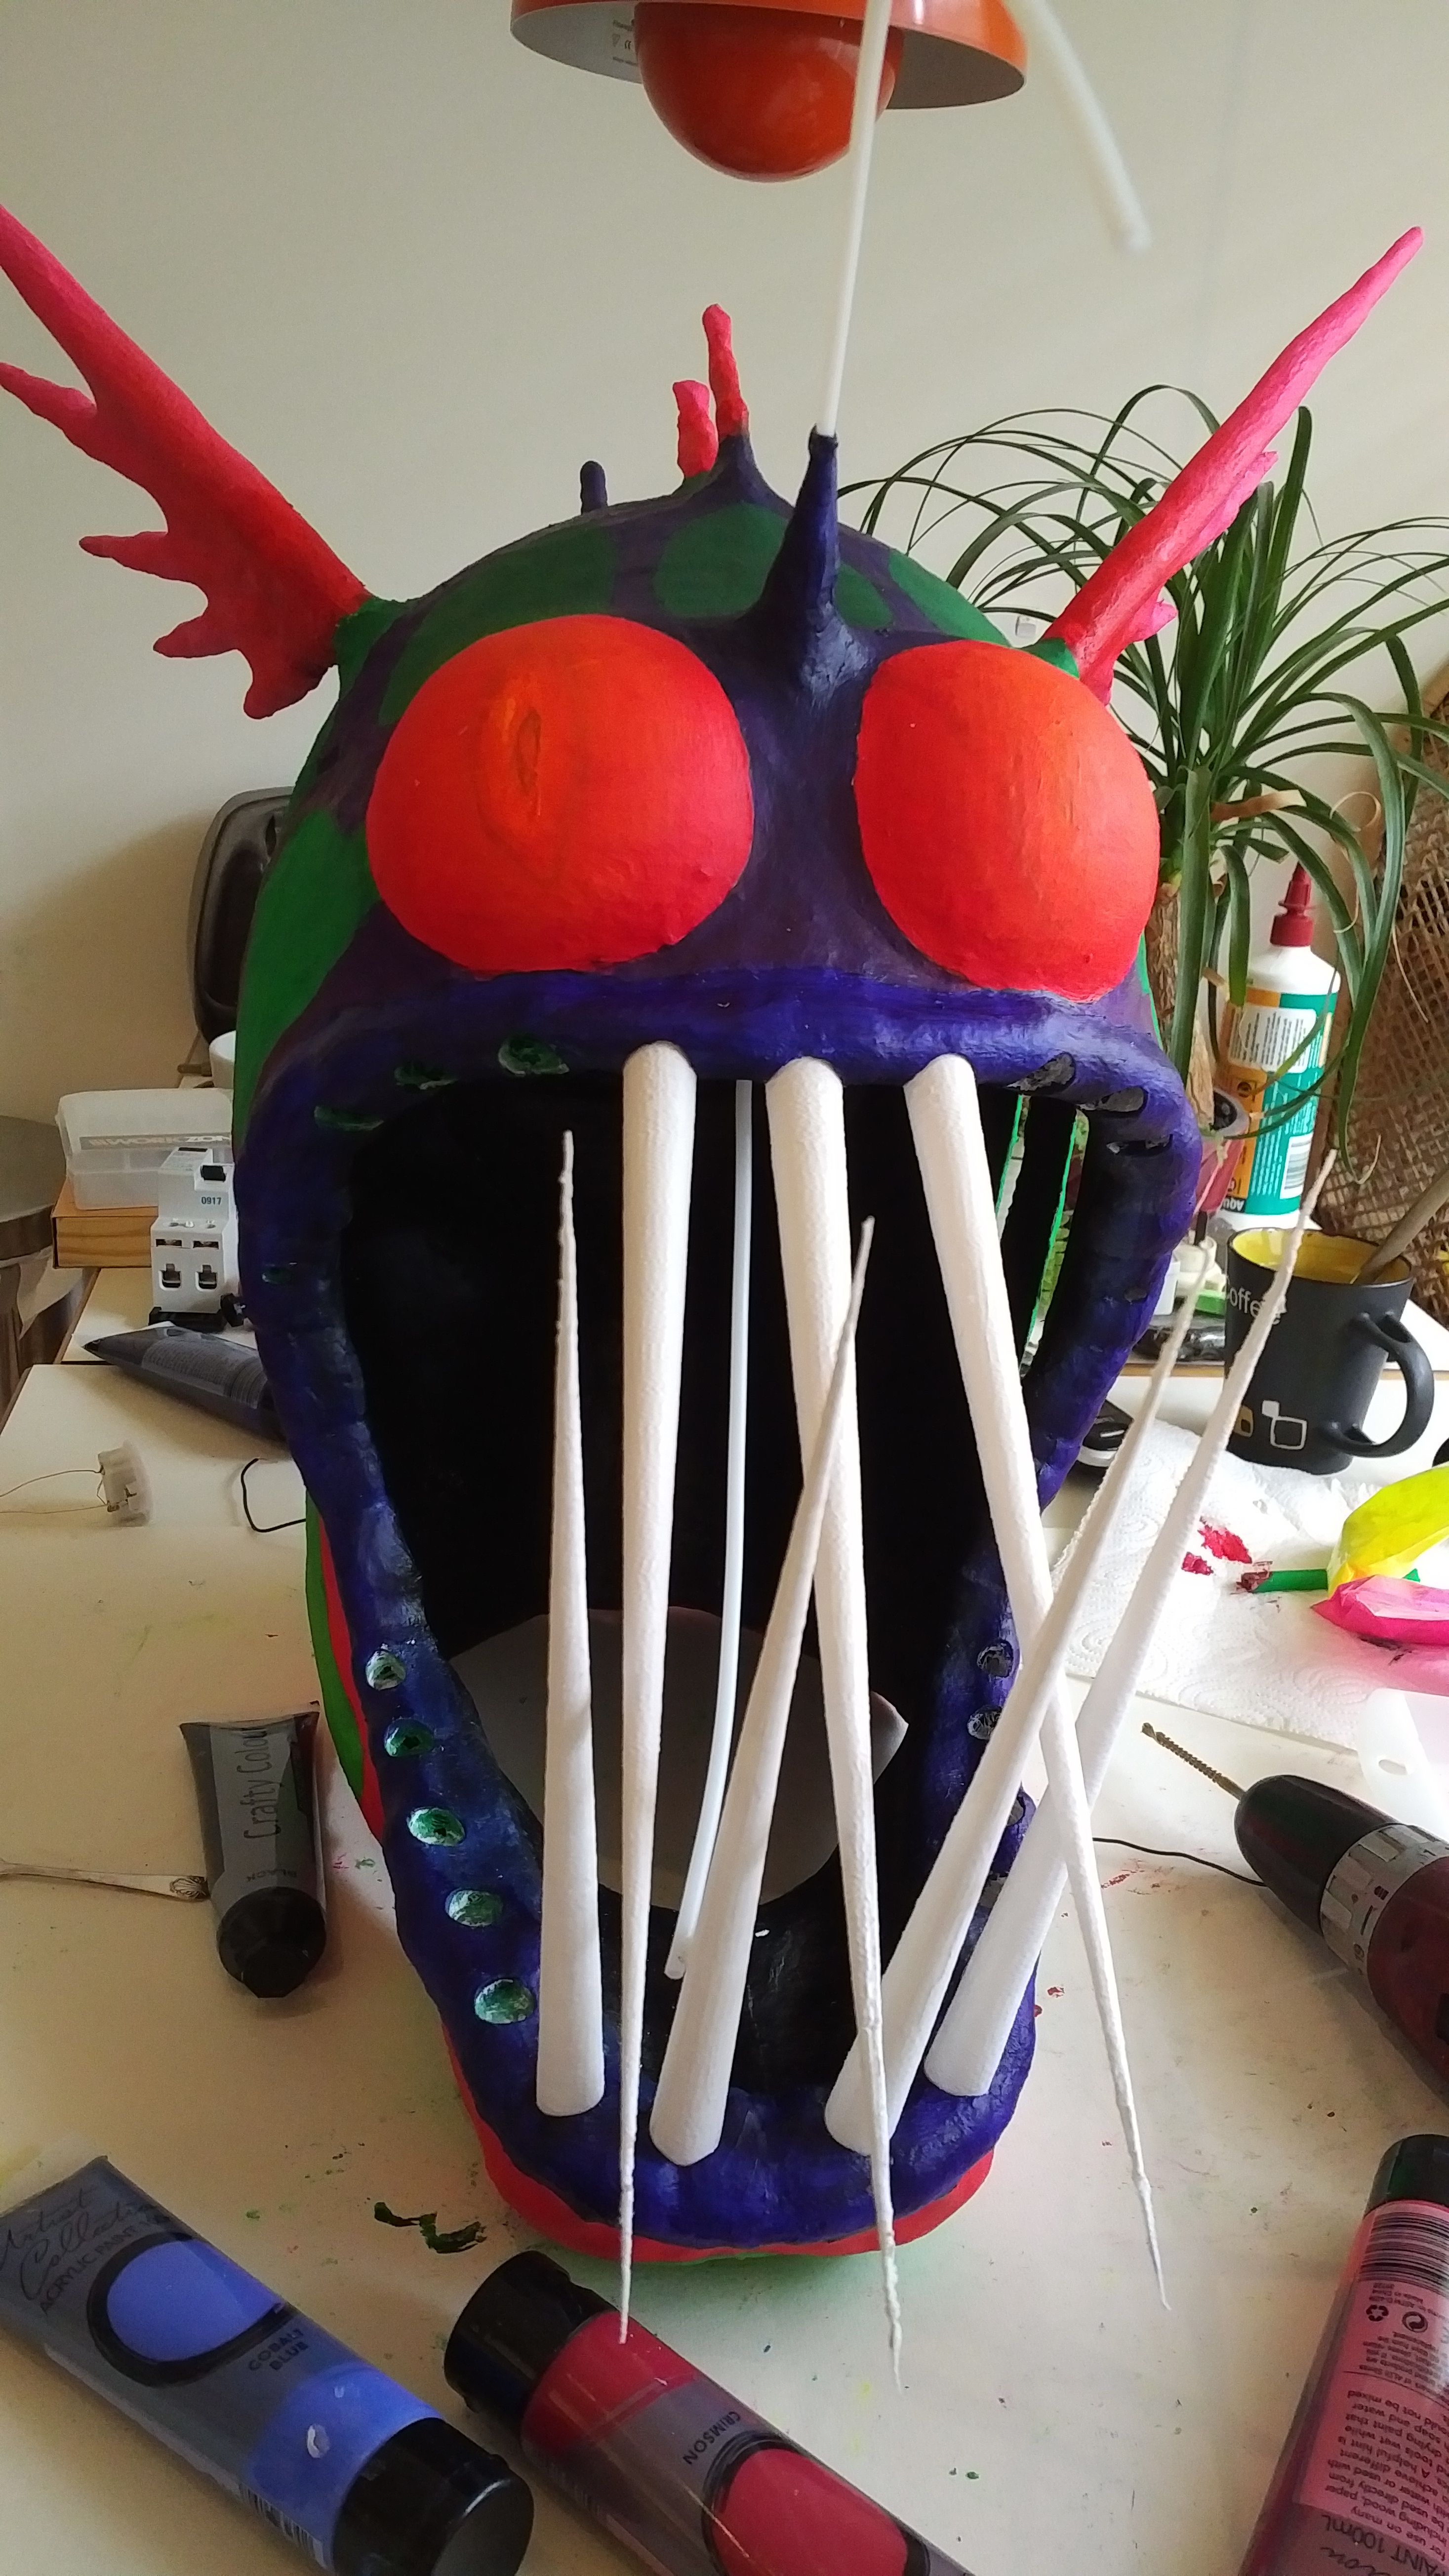
I then primed the body if the fish in white acrylic paint, before giving it a very fluro paint job. Once I was happy with the paint job I attached the teeth using hot glue, then added the angler rod and light ball. For the rod I simply used some old ptfe tube, but you could use anything.
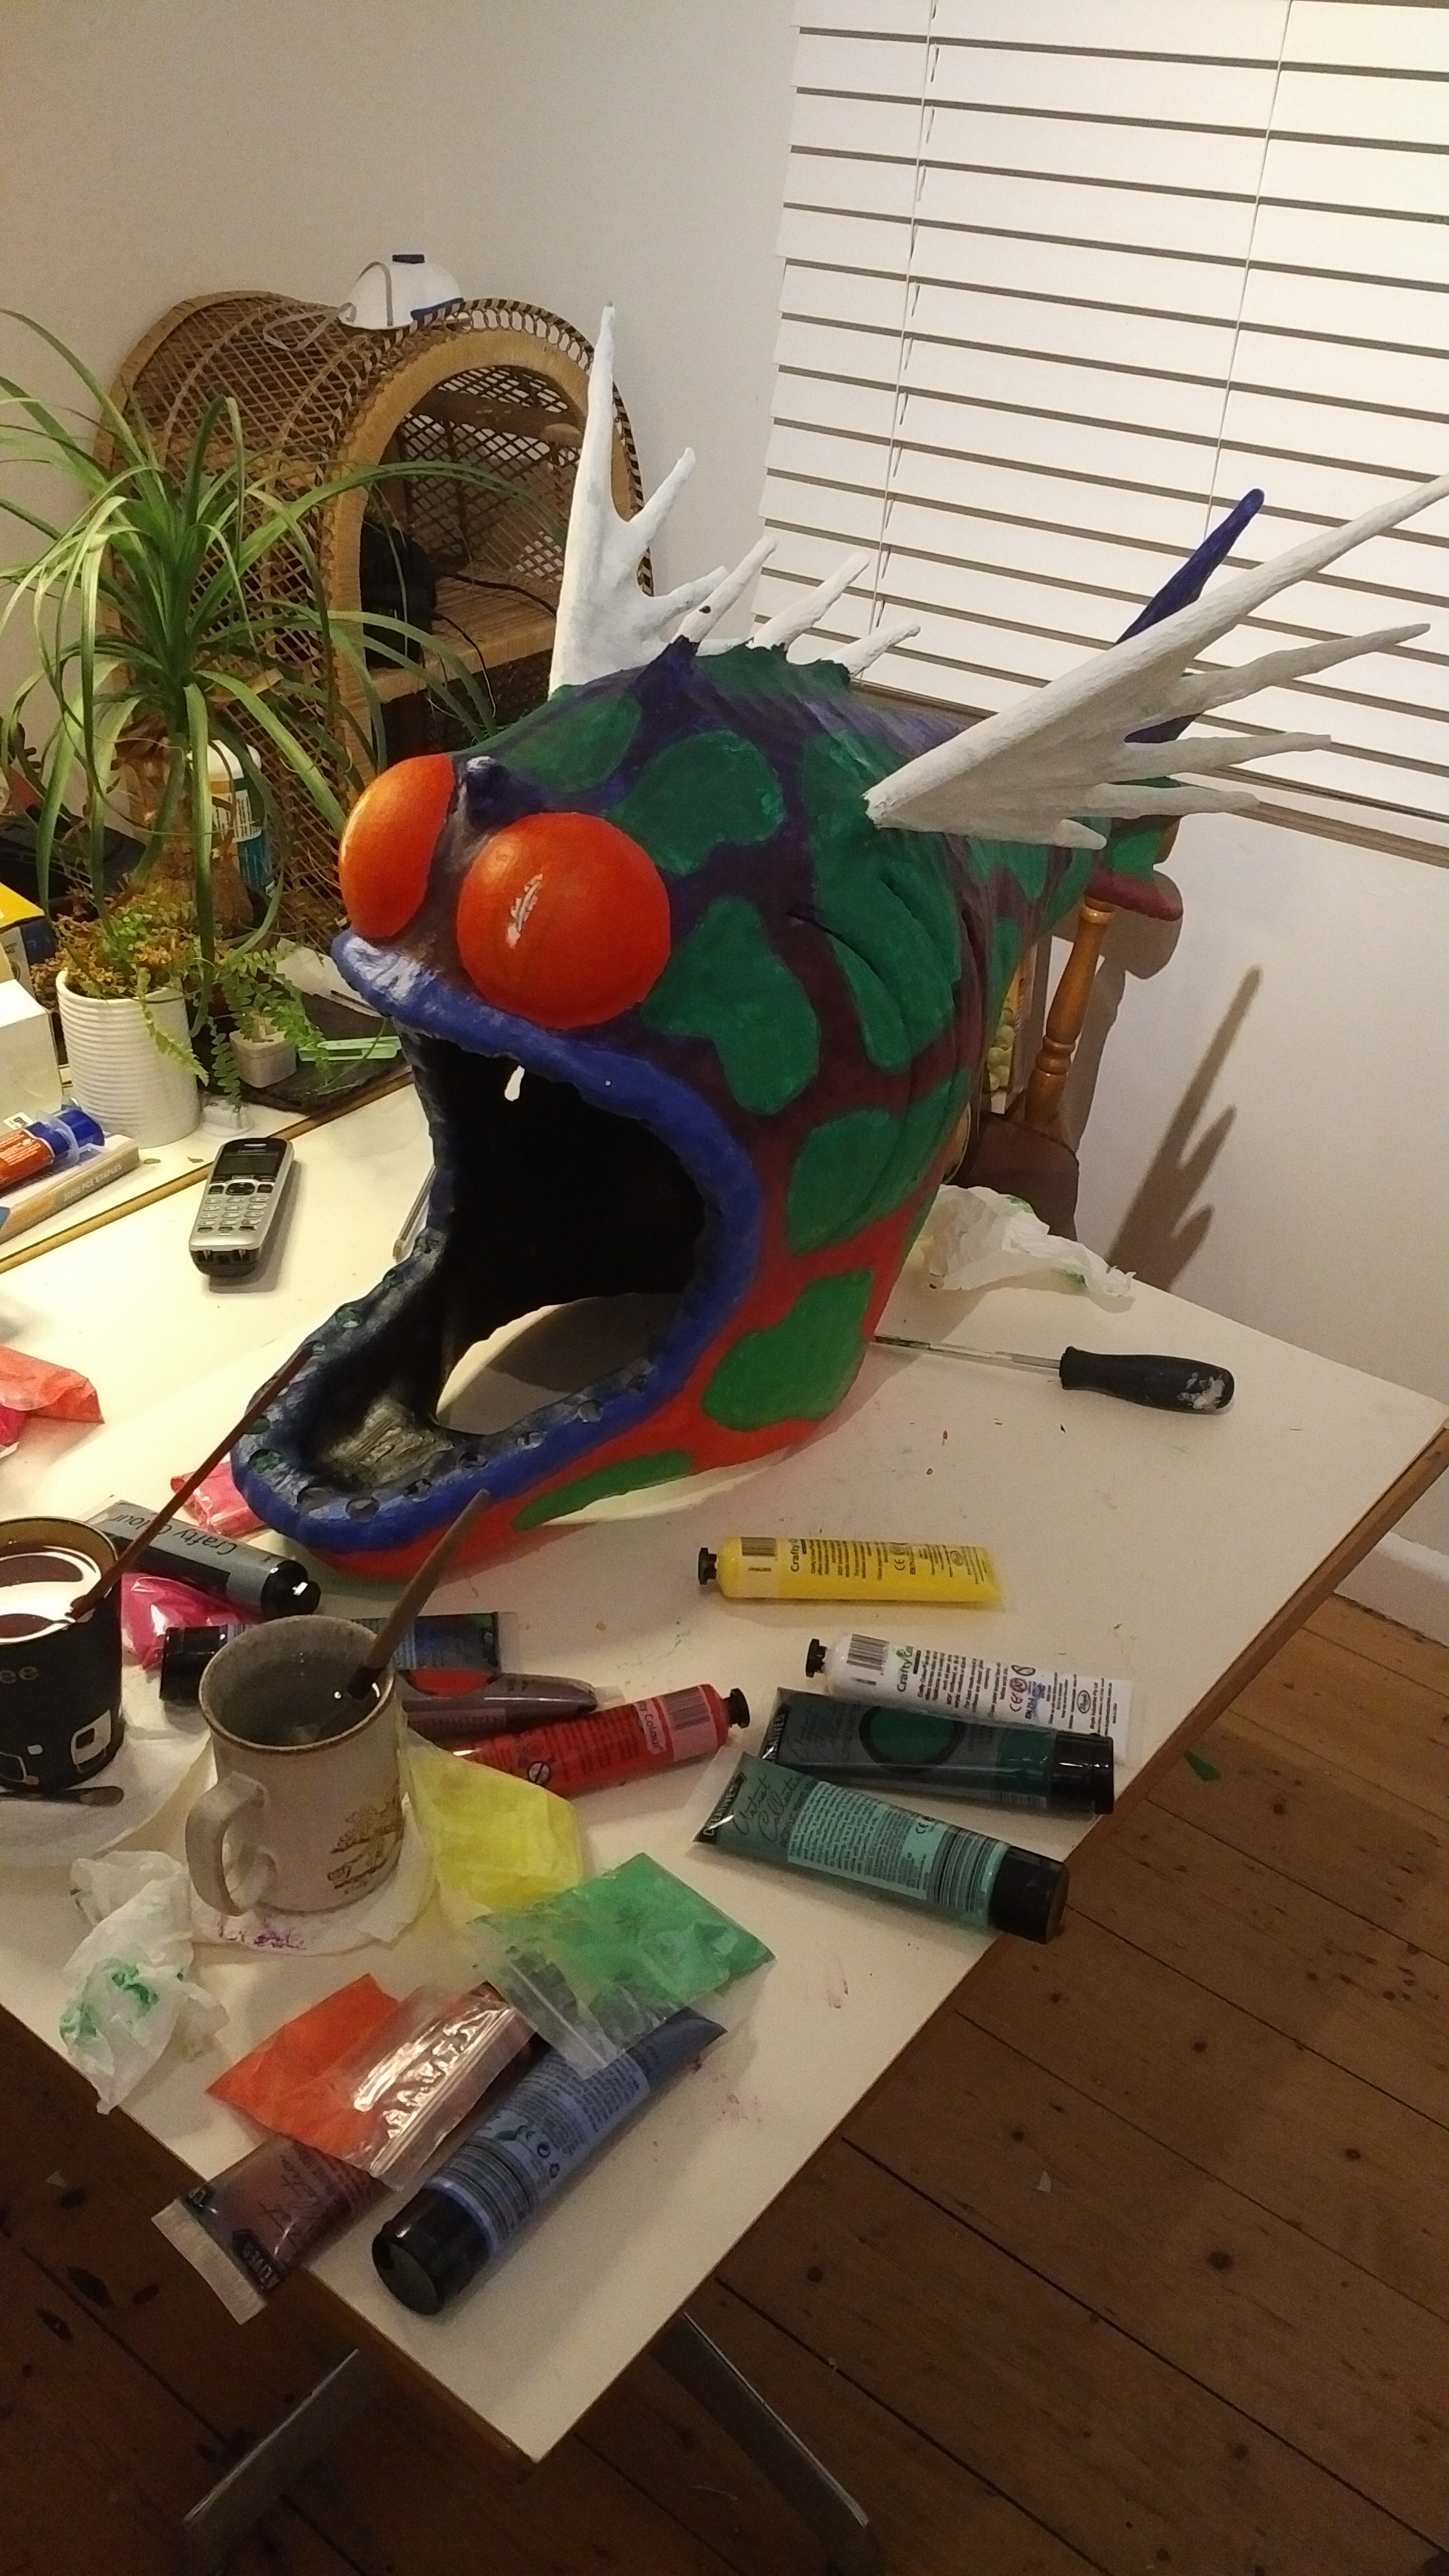
The colour-changing LED light and battery were cannibalized from a cheap $2 kmart Christmas decoration and connected with some thin enamel copper wire.