Once all the brake lines were fitted it was time to bleed the brakes. I had rebuilt my original master cylinder, honing and putting a seal kit in it, sadly it was worn past tolerance and leaked fluid. I was faced with the option of having my original cylinder lined with a stainless sleeve or working out a substitute. Having worked with Land Rover series 1 master cylinders before and the very odd recuperation system that makes non pressurised bleeding almost impossible, I decided to try my luck with a substitute. The substitute that I decided on was a series 2 master cylinder which cost a grand total of $30 and required me to drill an extra hole through the chassis mounting plate. The pushrod from my original master cylinder fitted in with a minimum of fuss, although I did have to shorten it a fraction and run a thread cutting die down it.
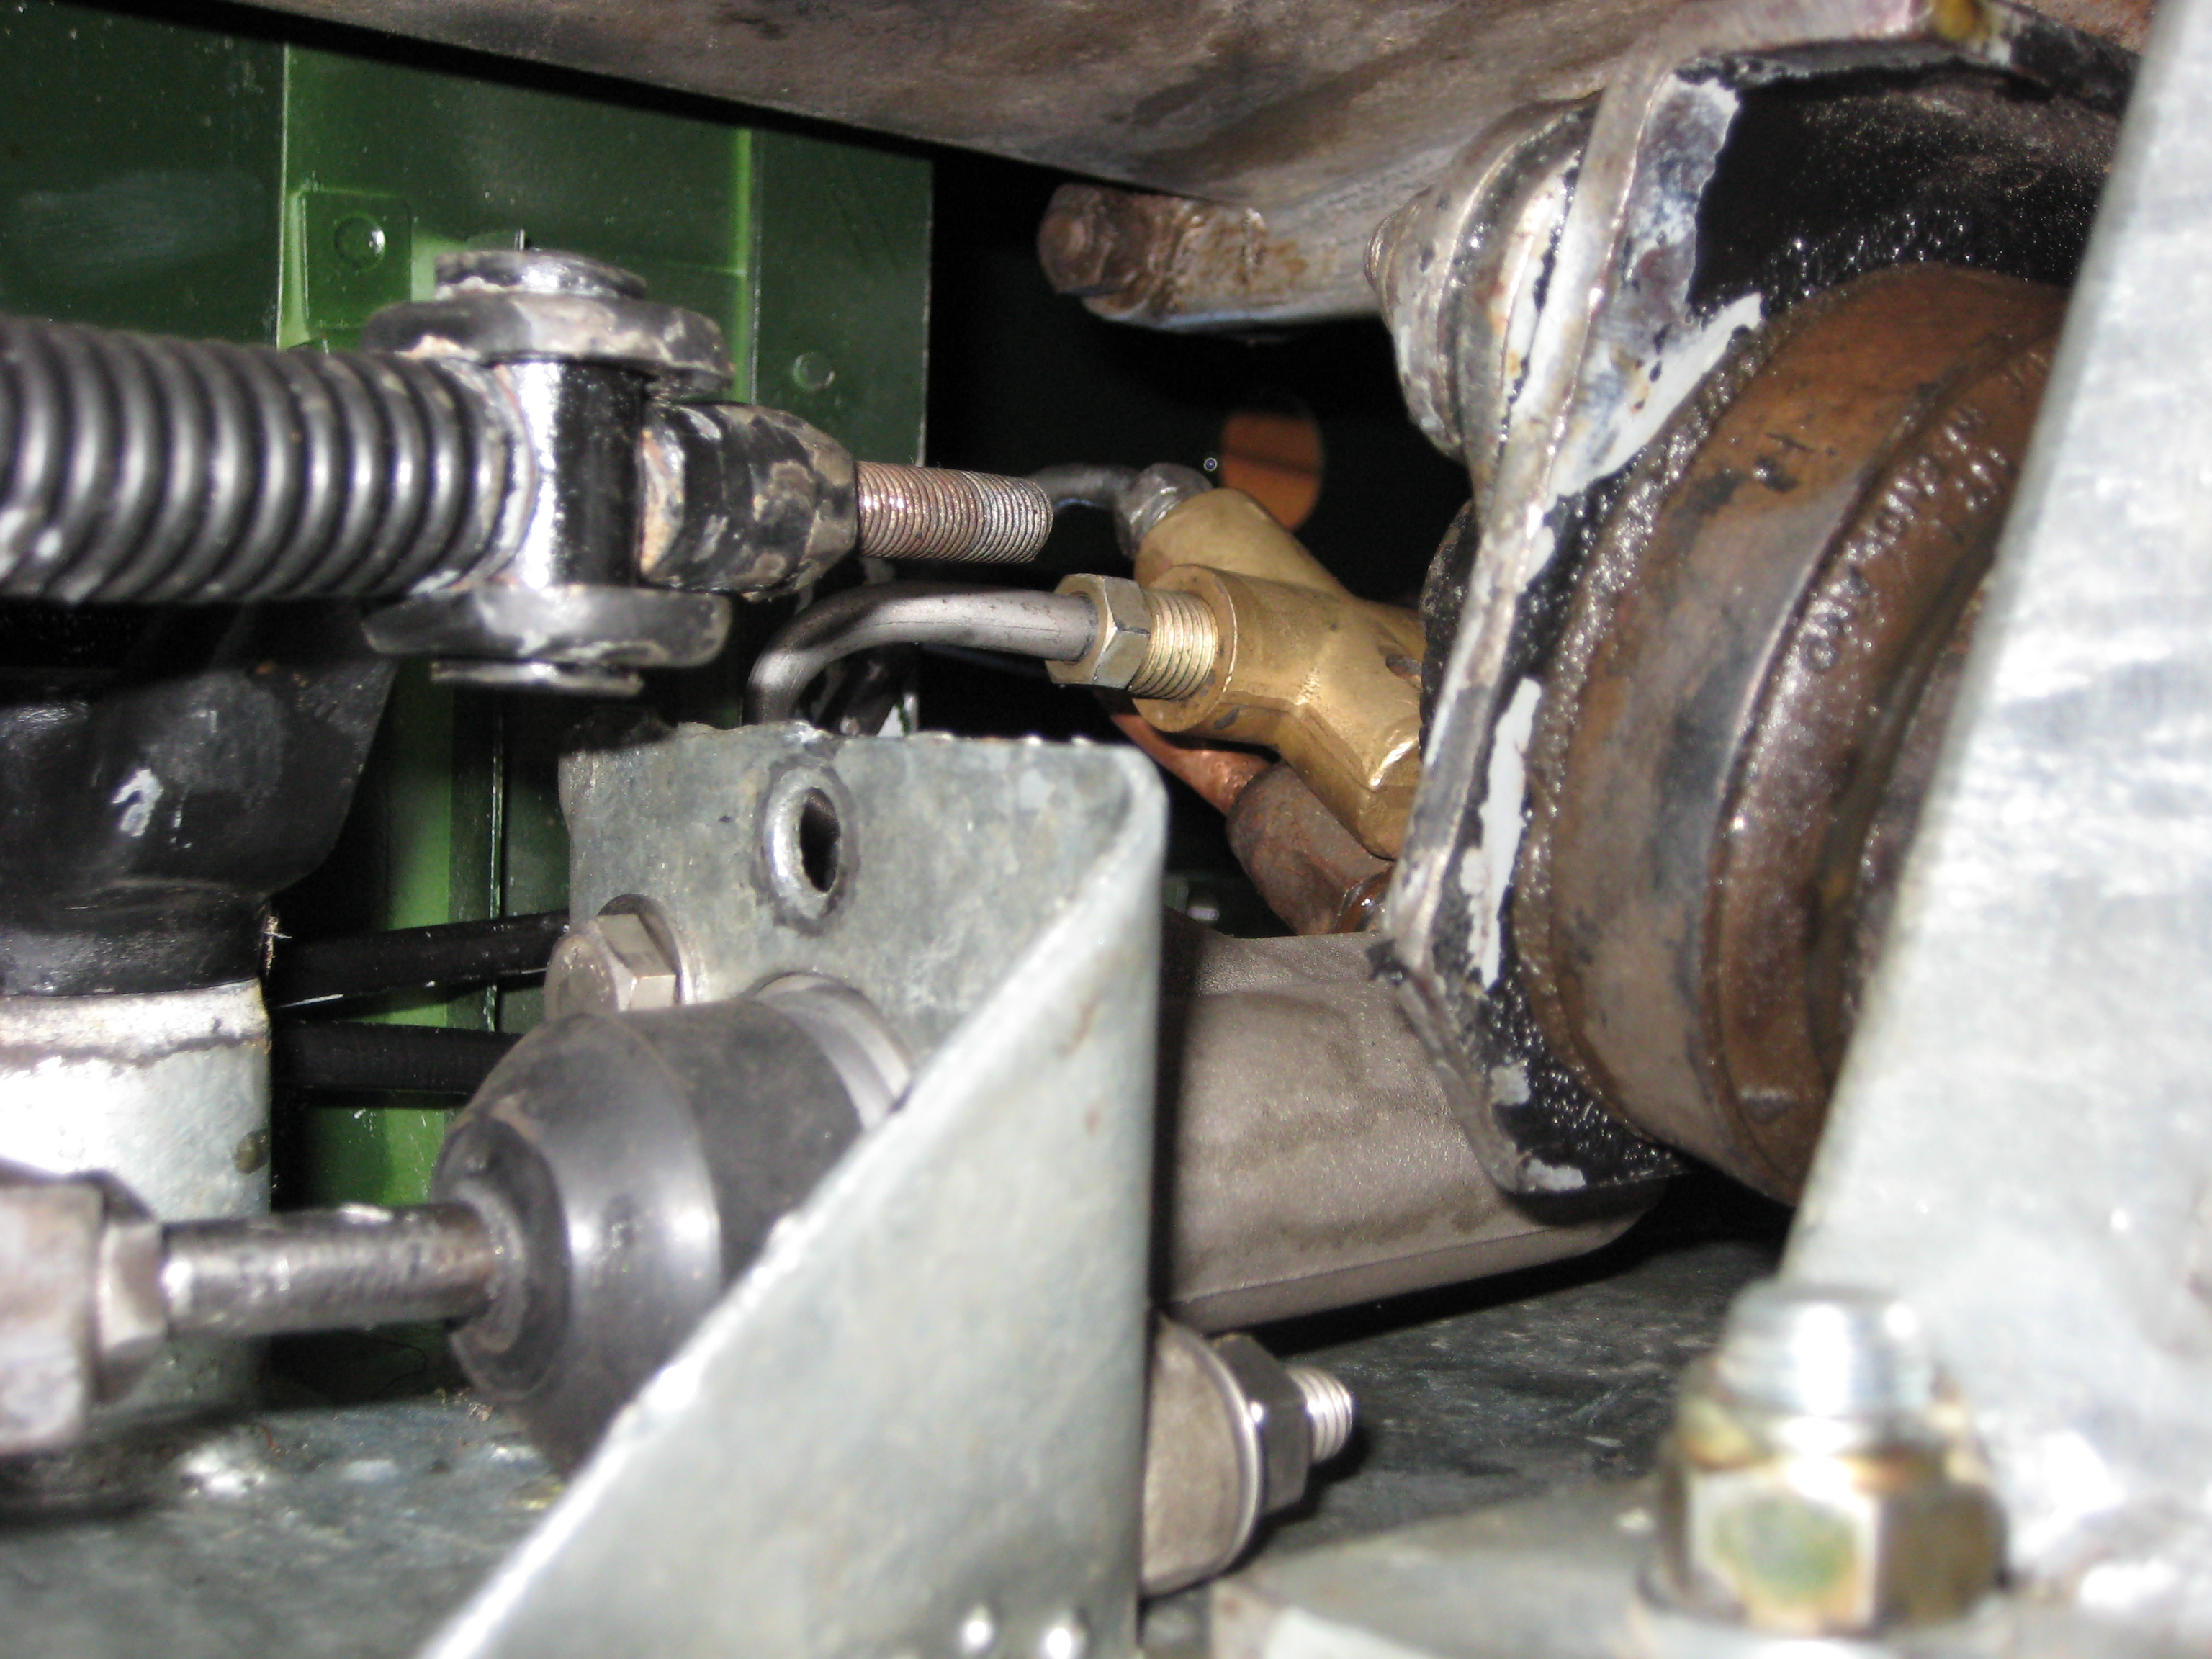
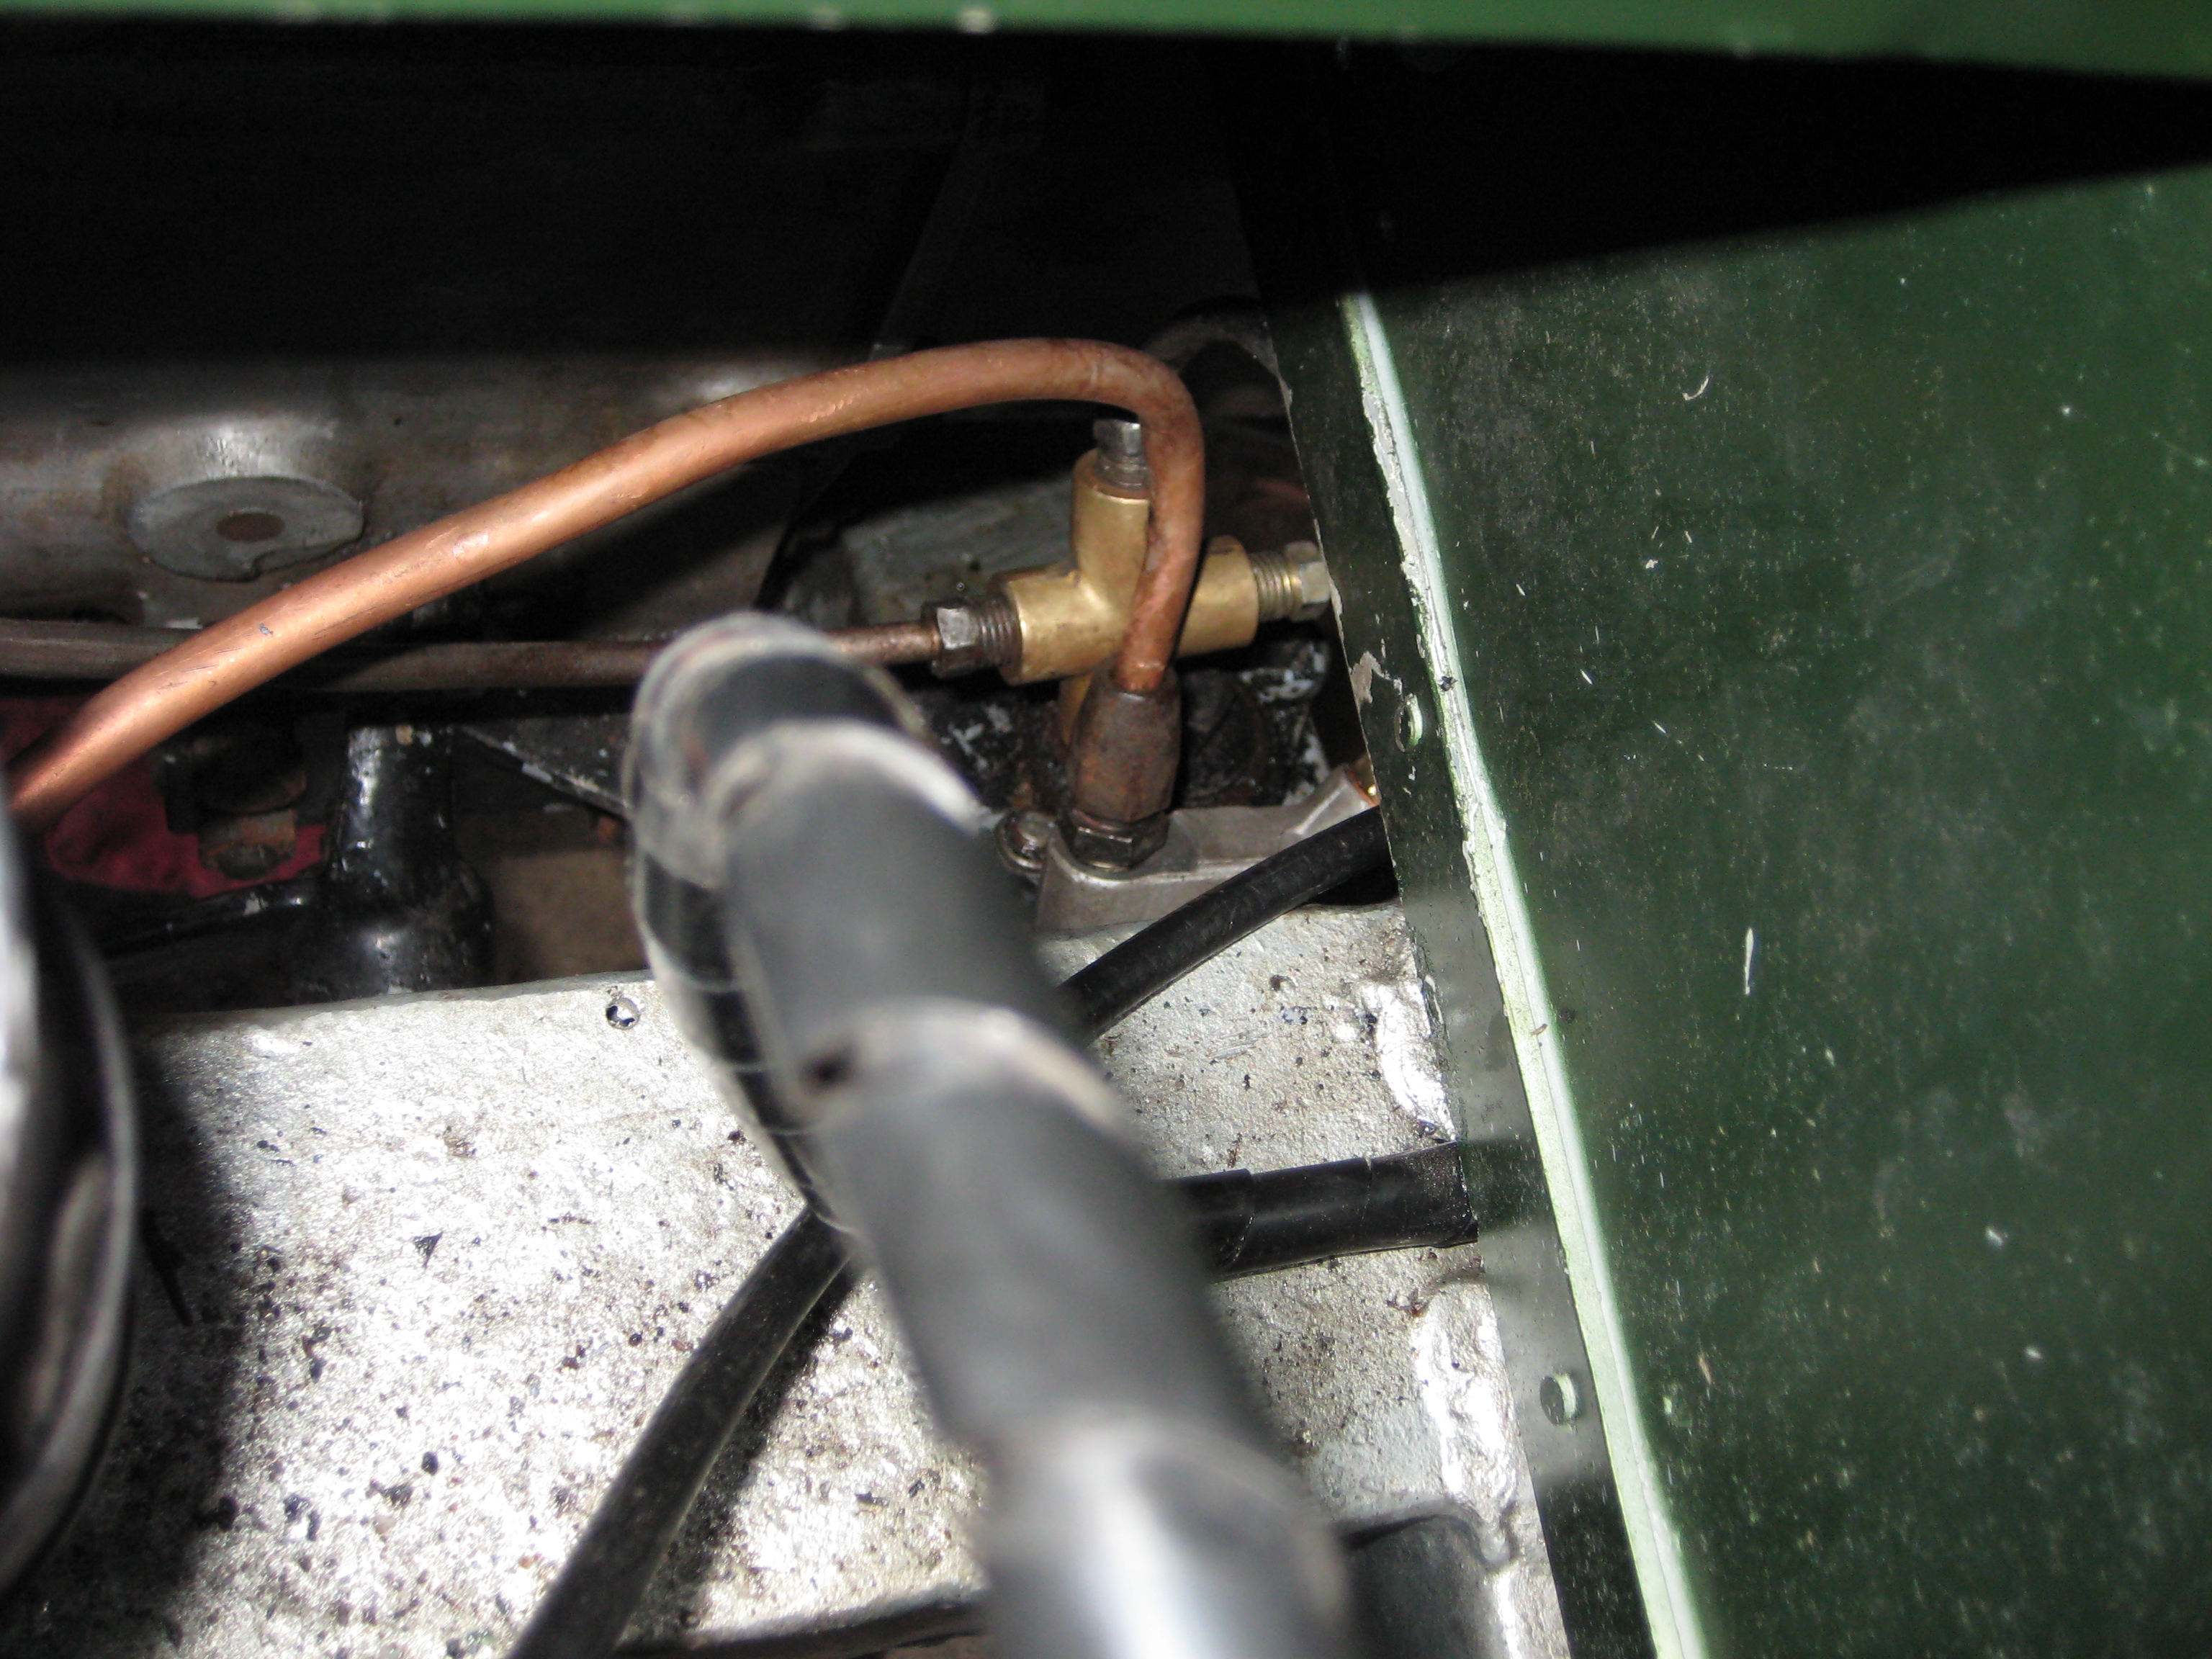
As you can see it all fits snugly. bleeding the brakes was quick and easy by simply pressurising the reservoir with a pressurising cap and bleeding the fluid through each wheel cylinder starting with the one furthest away from the driver till no bubbles came through. By using a bleeding bottle smaller than the reservoir capacity you will have a good indicator of then it is time to refill the reservoir.

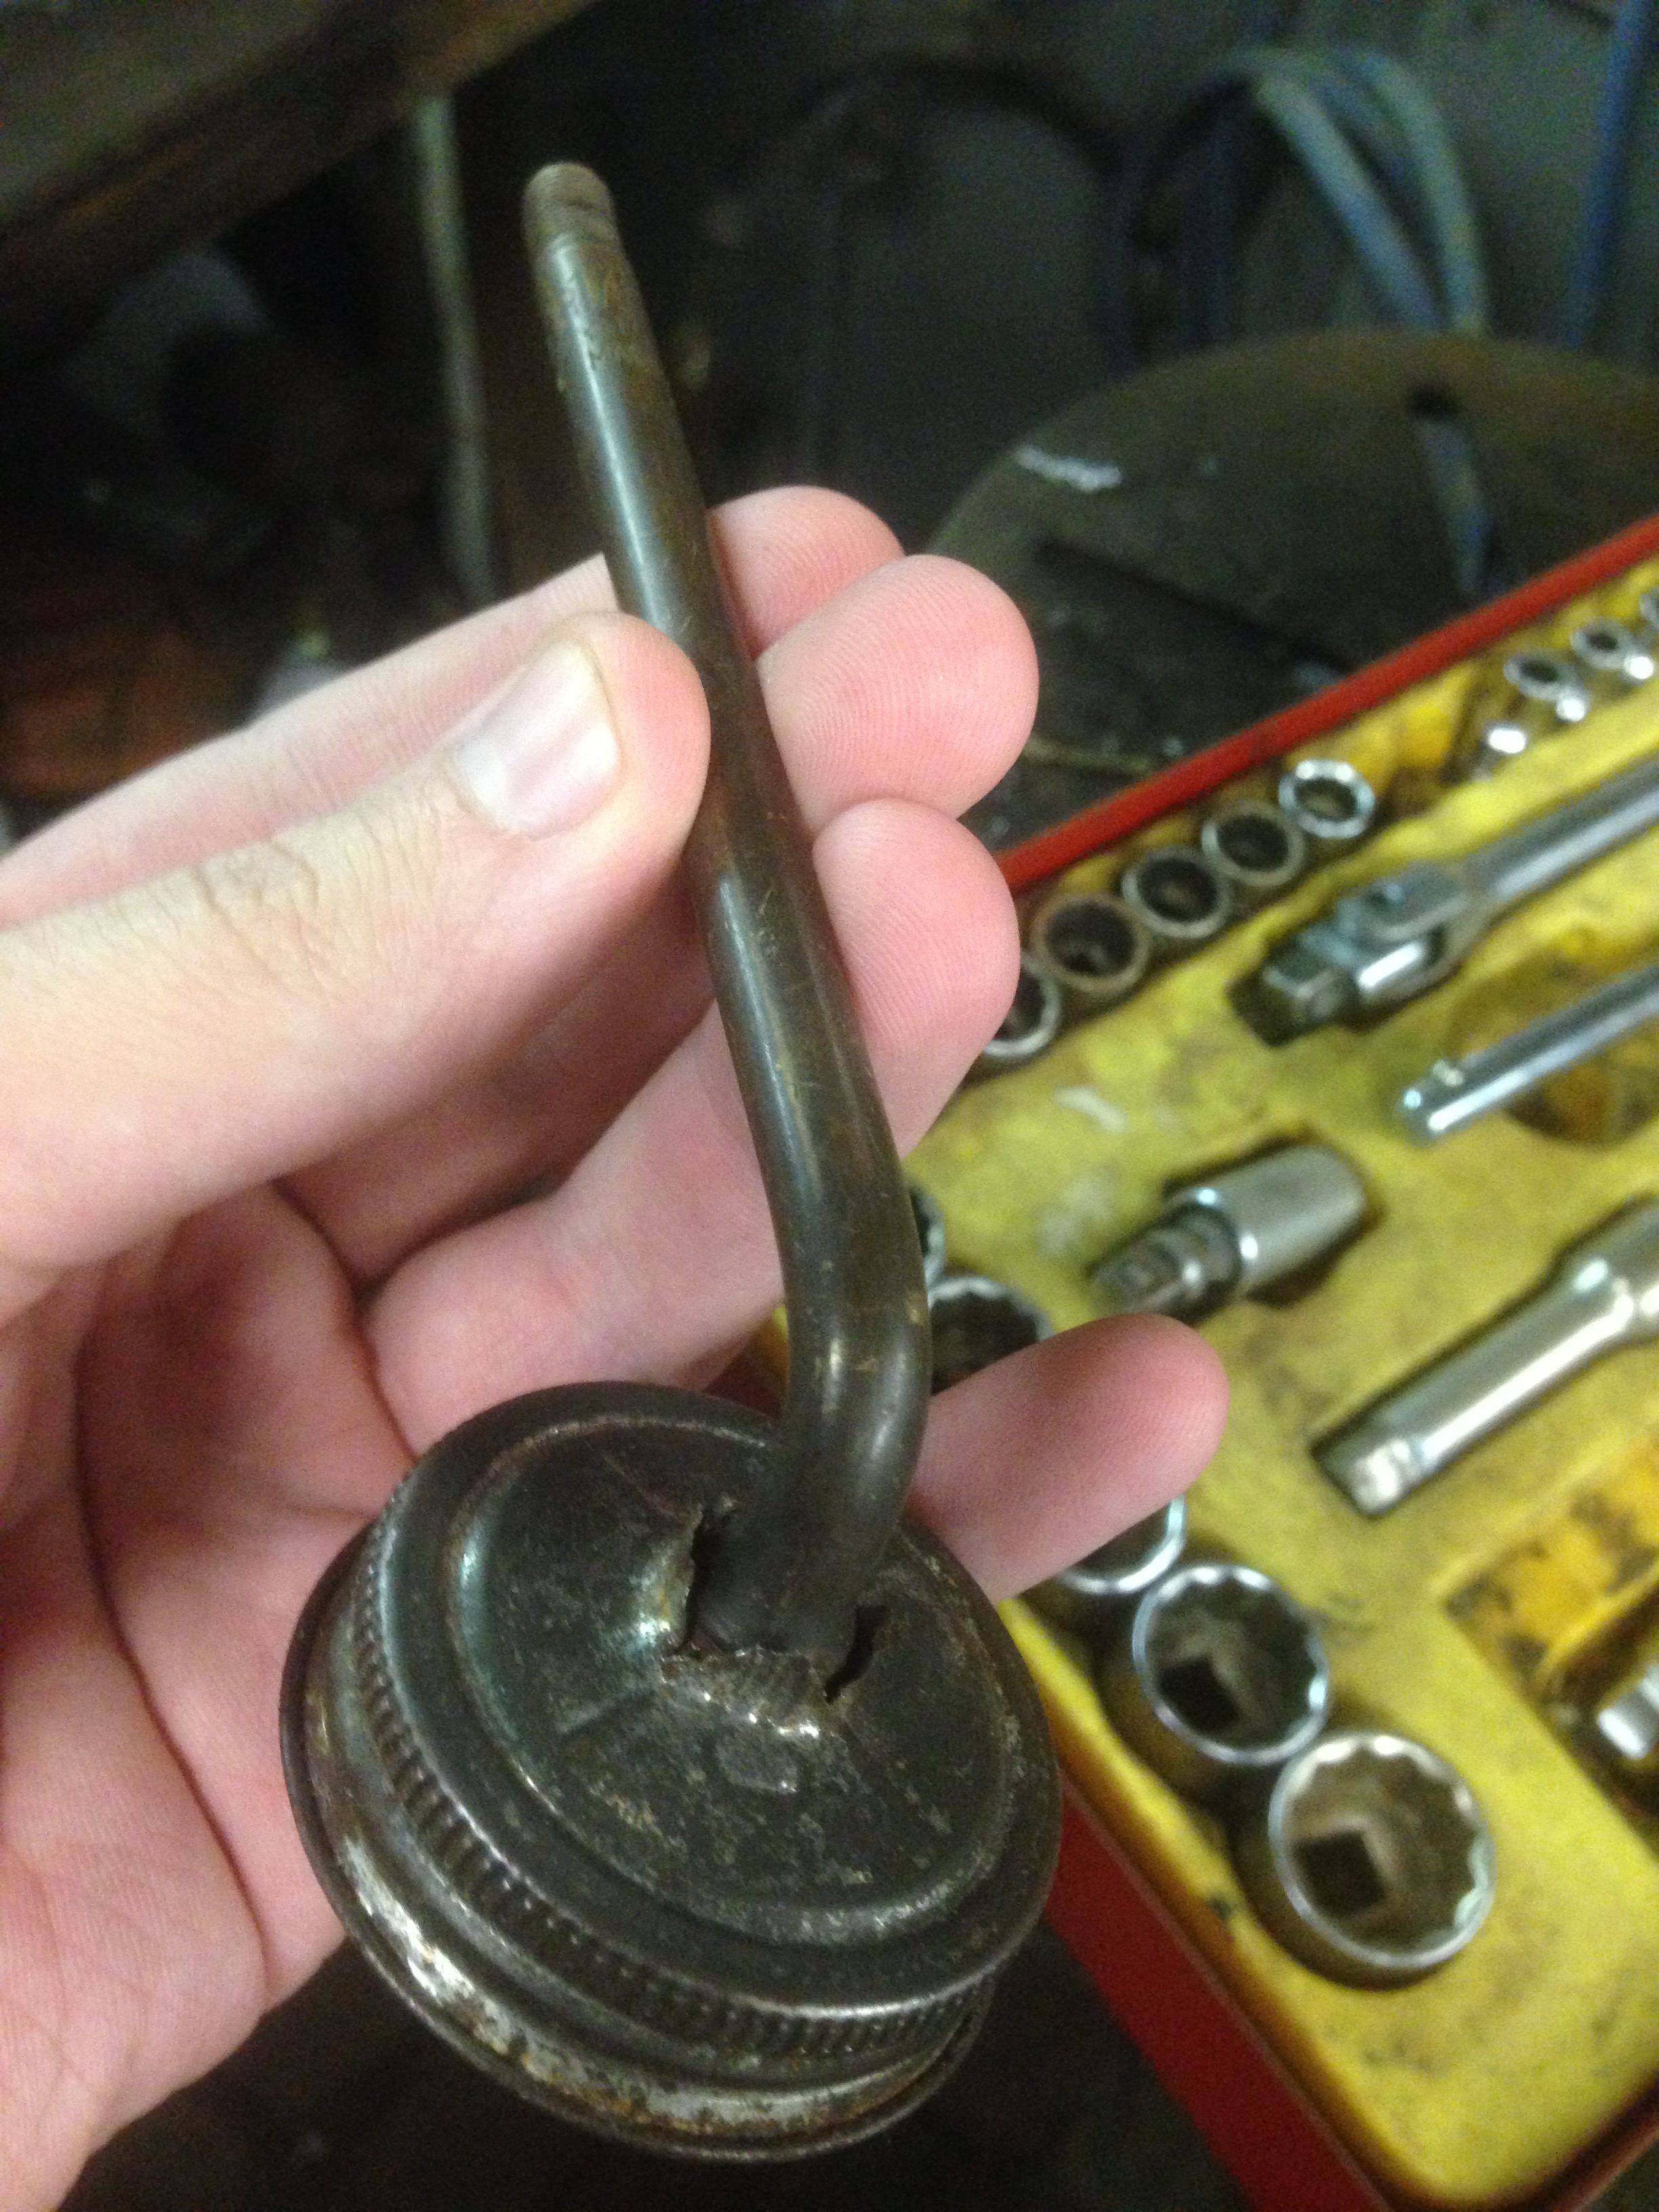
An easy way to make a pressurising cap for your reservoir is to use the lid from a kerosene or paint thinners can with the child safety mechanism removed, make a hole in the center, then feed the valve stem from an old inner tube through it, cutting the excess inner-tube to fit exactly inside the cap so as to make a seal. A few pumps with a bicycle pump should then do the trick.

